
20 Chocolate Brown Nail Designs to Save
By Zohana • October 4, 2026 • Updated November 9, 2026 • 14 min read
format_list_bulletedTable of Contents
Quick Navigation- 1. Glossy Cocoa Nails
- 2. Brown French Tips
- 3. Chocolate Chrome Accents
- 4. Mocha Marble Nails
- 5. Brown Velvet Nails
- 6. Brown Ombre Tips
- 7. Brown Tortoiseshell Nails
- 8. Matte Espresso Nails
- 9. Brown Swirl Accents
- 10. Brown French Outline
- 11. Chocolate Glazed Nails
- 12. Chocolate Floral Details
- 13. Chocolate Swirl Tips
- 14. Brown and Gold Foil
- 15. Cocoa Checkerboard Nails
- 16. Espresso Cat Eye
- 17. Brown Aura Nails
- 18. Chocolate French Almonds
- 19. Mocha Glitter Accents
- 20. Deep Chocolate Nails
- CONCLUSION
- Shop These Styles
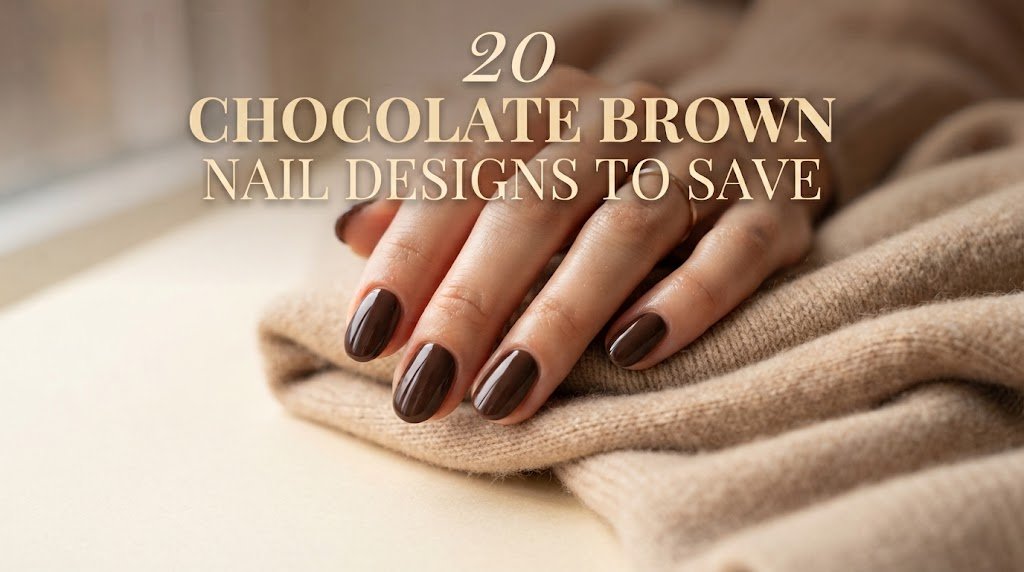
Chocolate brown is one of the easiest nail colors to wear, and it suits almost everyone. It is warm, rich, and polished, but it never feels loud or hard to match. A deep cocoa shade looks good with denim, cream knits, camel coats, black outfits, and gold jewelry, so it fits into a normal wardrobe without any extra effort. It also works in every season, from cozy fall days to summer evenings out.
This list shares 20 chocolate brown nail designs, from glossy solid color and soft French tips to marble swirls, velvet finishes, chrome accents, and fun patterns like tortoiseshell and checkerboard. Each idea comes with simple tips on how to wear it, which nail shape suits it best, and what to avoid. Save the photos you love and show them to your nail artist, or use the steps to try the look at home.
Before you pick a design, think about your skin tone and your nail length. Lighter mocha and caramel shades look fresh on fair skin, while deep espresso and dark chocolate look rich on medium and deep skin tones. Short nails suit simple designs like glossy cocoa, matte espresso, and thin French outlines, while longer almond or square nails give patterns like marble, swirls, and checkerboard more room to show. A glossy top coat makes any brown shade look richer, and a good base coat keeps the dark color from staining your natural nails.
1. Glossy Cocoa Nails
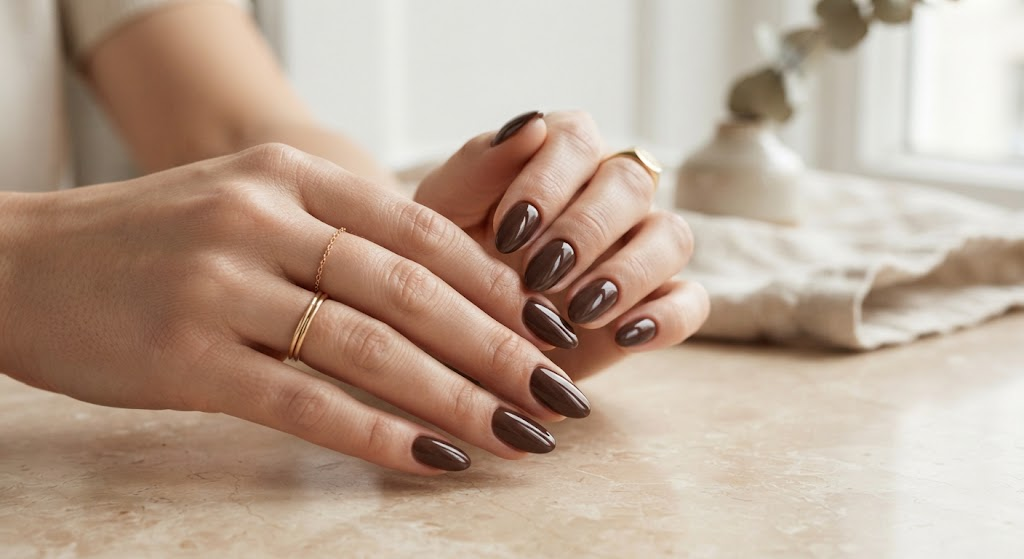
A rich cocoa polish gives you an instantly polished manicure with no extra decoration needed. This deep brown shade looks especially sleek on almond or oval nails, where the curved shape softens the color. Apply two thin coats instead of one thick layer so the color stays smooth and even, then seal the free edge with a high gloss top coat to keep the shine. This style suits women who want something smart but easy to match, and it pairs well with cream sweaters, denim, camel coats, black outfits, and gold accessories. It is a safe first pick if you have never tried brown nails before.
2. Brown French Tips
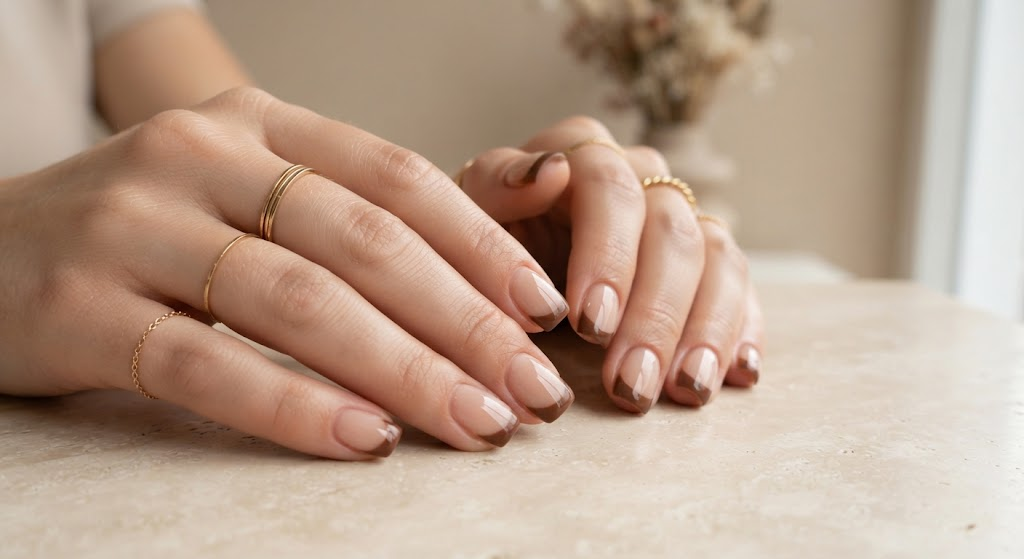
- Choose a sheer pink or milky nude base for contrast.
- Keep the brown tips narrow for a delicate finish.
- Match the tip shape to your natural nail edge.
- Use a fine French tip brush for cleaner curves.
- Finish with a glossy top coat to unify the manicure.
Brown French tips are a softer choice than classic black or white tips. The warm chocolate shade adds depth while the light base keeps the whole manicure fresh and easy to wear. On shorter nails, a thin curved tip can make the nails look longer. This combination works well for office outfits, dinners, and everyday styling. Avoid wide, heavy tips, since they can make short nails look shorter instead of longer.
3. Chocolate Chrome Accents
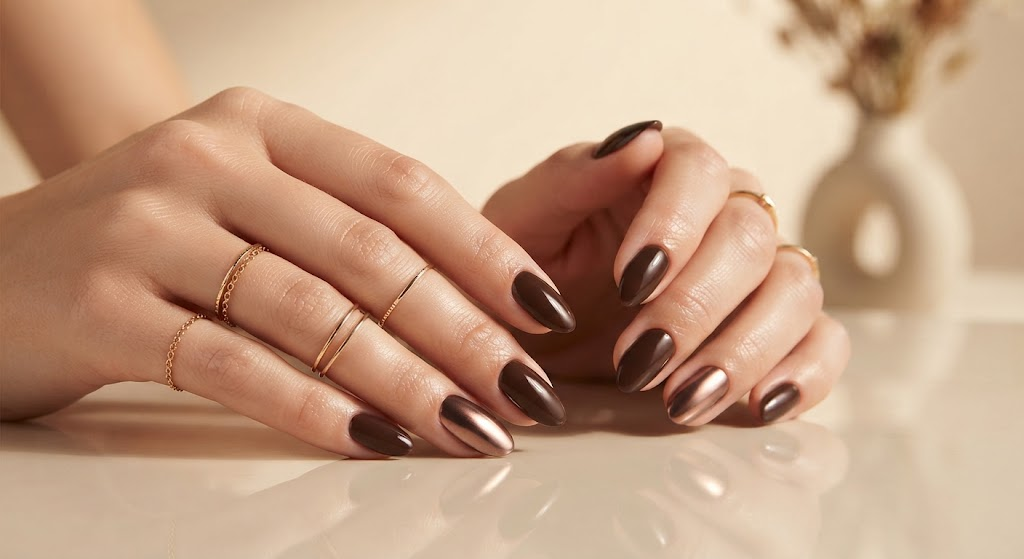
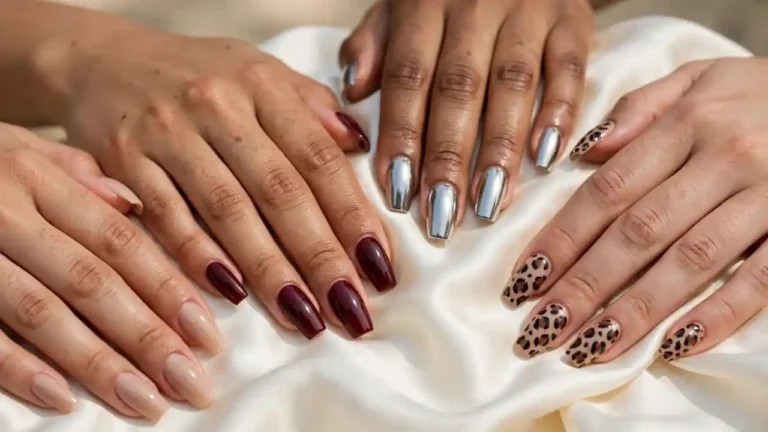
A little bronze chrome can make a dark manicure catch the light in a beautiful way. Apply the chrome powder over a glossy surface and keep it on one or two accent nails only, so the metallic finish stays refined instead of loud. Leave the rest of the nails in deep chocolate brown for balance. This pairing looks especially striking in evening light, where the brown base turns almost espresso colored and the chrome adds warmth. Skip chrome on every nail, since a full set can look too shiny and hide the rich brown underneath.
4. Mocha Marble Nails
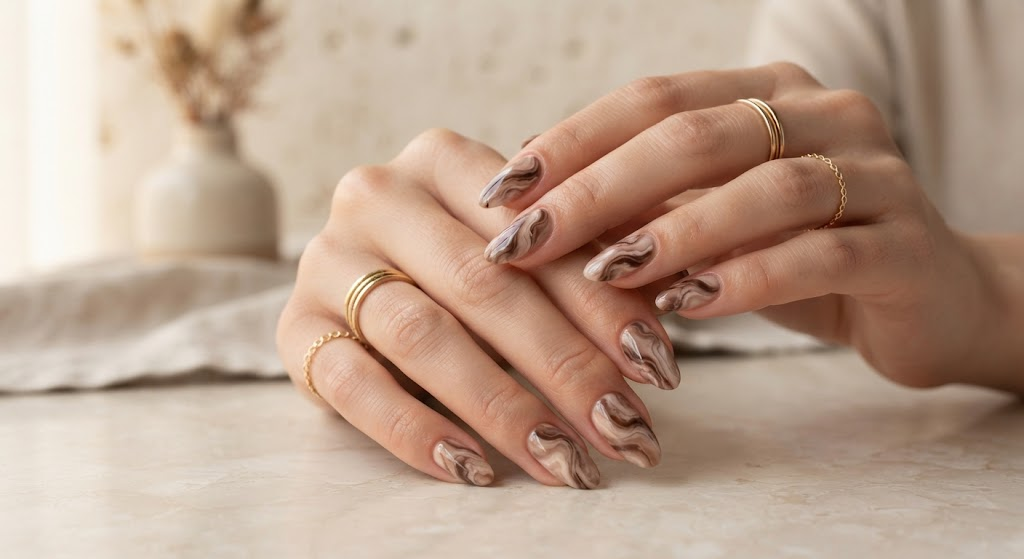
A plain dark manicure can feel heavy when every nail is the same solid color, and the deep shade can hide the nail shape. Soft mocha and cream swirls fix that by breaking up the dark base while keeping the colors in one warm family. The result has movement and gentle contrast without glitter or bright color. For a natural marble look, blend thin uneven lines instead of drawing perfect curves, since real stone never has matching patterns. Keep the cream details delicate, then add a glossy top coat to bring out the layered brown tones.
5. Brown Velvet Nails
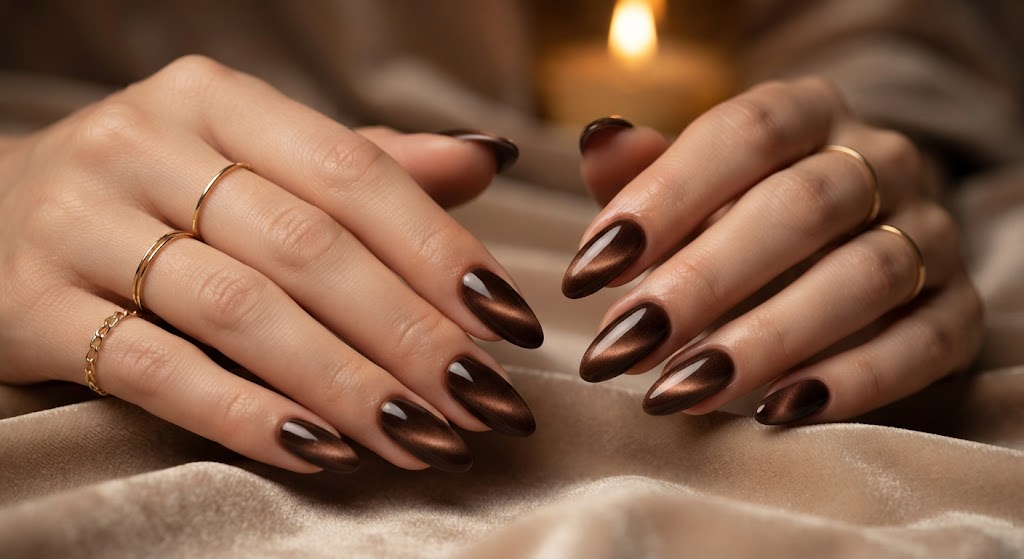
- Prep the nails: Shape the nails evenly and remove surface oils so the polish sticks well.
- Apply the base: Paint one thin layer of chocolate brown magnetic polish and cure it as the product directs.
- Create the velvet effect: Hold the magnetic tool close to each nail while the polish is still workable, moving slowly to form a soft reflective stripe.
- Seal the finish: Cure the nails fully and add top coat if your product needs it.
Velvet brown nails have a soft glow that shifts as your hands move under different light. The effect feels richer than plain shimmer but stays easy to wear every day. Work one nail at a time so the magnetic particles stay responsive before you cure them. This look suits medium and long nails best, since the longer surface shows the velvet stripe more clearly. Avoid rushing the magnet step, or the stripe will look faint and uneven.
6. Brown Ombre Tips
| Feature | Option A: Soft Ombre | Option B: Deep Ombre |
| Base | Milky nude | Warm beige |
| Brown shade | Medium mocha | Dark chocolate |
| Finish | Subtle gradient | Strong contrast |
| Best nail shape | Almond | Coffin or square |
A brown ombre manicure gives you the depth of chocolate polish without covering the whole nail in one solid shade. The slow change from nude to brown also makes the nails look longer and lighter. A sheer nude base works well for everyday wear because the grow out line stays less visible as the nails grow. Pick the soft ombre for a gentle everyday look, and the deep ombre when you want more contrast for evenings or events. Blend the middle of the gradient well, since a hard line between the two colors ruins the smooth fade.
7. Brown Tortoiseshell Nails
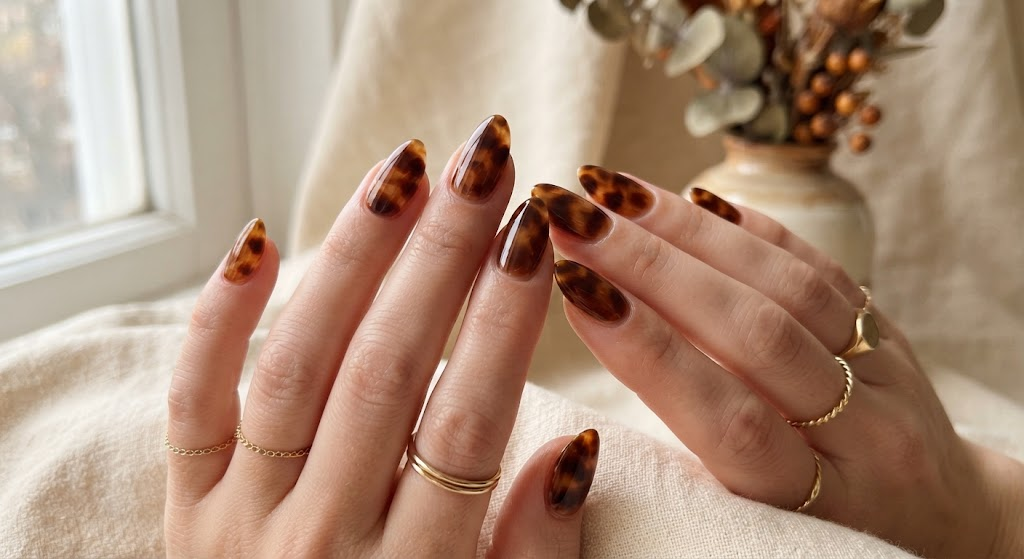
DO:
- Layer caramel and dark brown patches for natural contrast.
- Keep each tortoiseshell pattern slightly different.
- Use translucent brown layers to create depth.
- Seal the design with a glossy top coat.
DON’T:
- Make every patch the same size.
- Use too many bright orange tones.
- Cover the pattern with a matte finish unless you chose it on purpose.
- Overcrowd every nail with dense dark patches.
Tortoiseshell brings several warm brown shades together, so it matches neutral wardrobes with ease. The layered pattern looks especially rich on almond nails because the longer shape gives each patch room to show. For a more wearable set, leave one or two nails in solid chocolate brown so the patterned nails have visual breathing room. Avoid making every nail patterned, since the design can start to look busy instead of rich.
8. Matte Espresso Nails
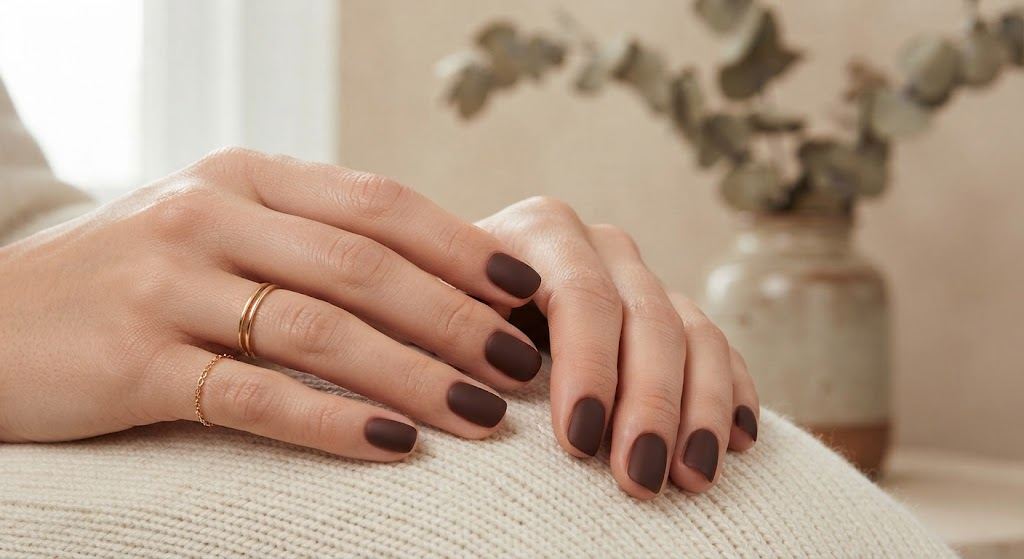
Cost: Low if done at home. Time: About 30 minutes. Skill level: Beginner. Best for: Short to medium nails.
Matte espresso nails are a smart pick when you want a darker manicure without the shine of normal polish. The soft, velvety finish feels modern and understated, while the deep shade keeps the nails clearly defined. Apply thin layers and let each coat dry fully before the next one, then finish with a matte top coat. A matte top coat can also refresh the look after a few days of wear. Avoid touching the nails before they are fully dry, since matte polish shows smudges more than glossy polish does.
9. Brown Swirl Accents
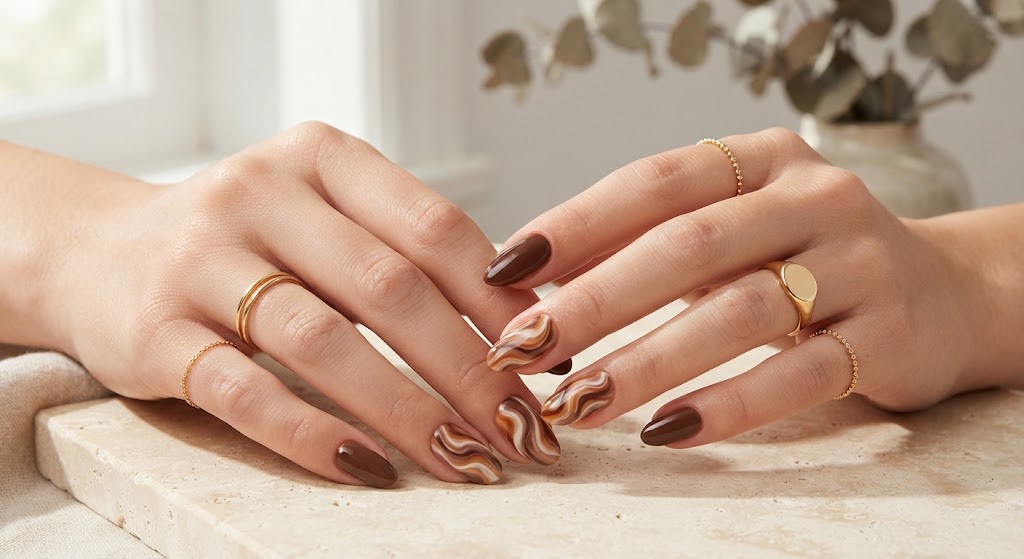
A little movement can change the whole feel of a brown manicure. Pairing solid cocoa nails with curved caramel and cream lines adds a playful touch without covering every nail in a busy pattern. Keep the swirl lines thin and slightly varied in thickness for a hand painted look, and let each color dry before you add the next curved detail. Three shades are usually enough to build depth without making the design hard to follow. This look suits medium nails best, and it works well for women who want something fun but still easy to match with everyday outfits.
10. Brown French Outline
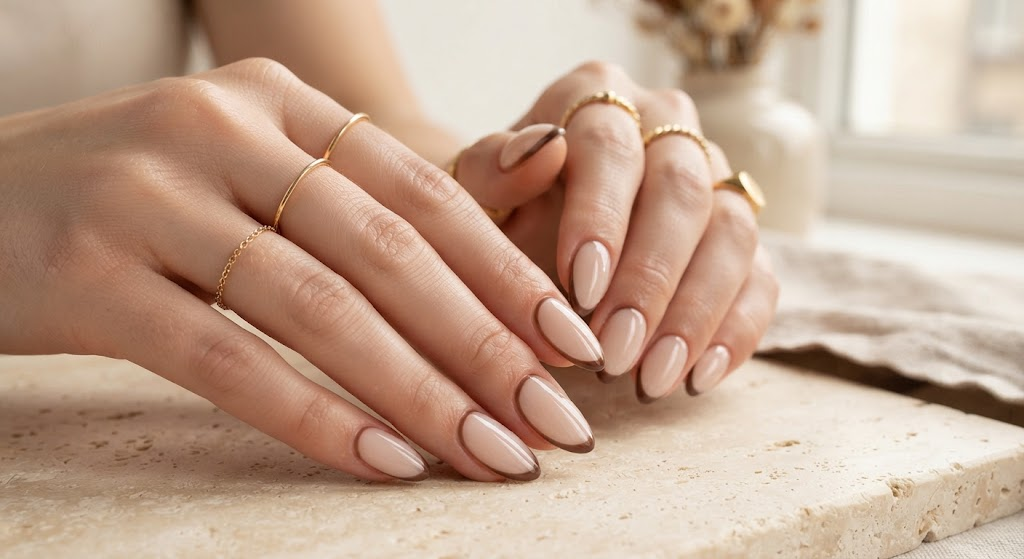
- Start with a sheer nude or milky base.
- Trace a very thin chocolate line around the free edge.
- Keep the outline consistent across each nail.
- Use a fine nail art brush for sharper curves.
- Seal carefully with a clear glossy top coat.
A brown outline gives the classic French manicure a modern twist while keeping the design light and understated. The thin border defines the nail shape without making the nails look shorter. This works especially well on almond and squoval nails. For a softer everyday version, choose a medium mocha shade instead of very dark espresso brown. Avoid a thick outline, since a heavy line takes away the delicate feel that makes this design special.
11. Chocolate Glazed Nails
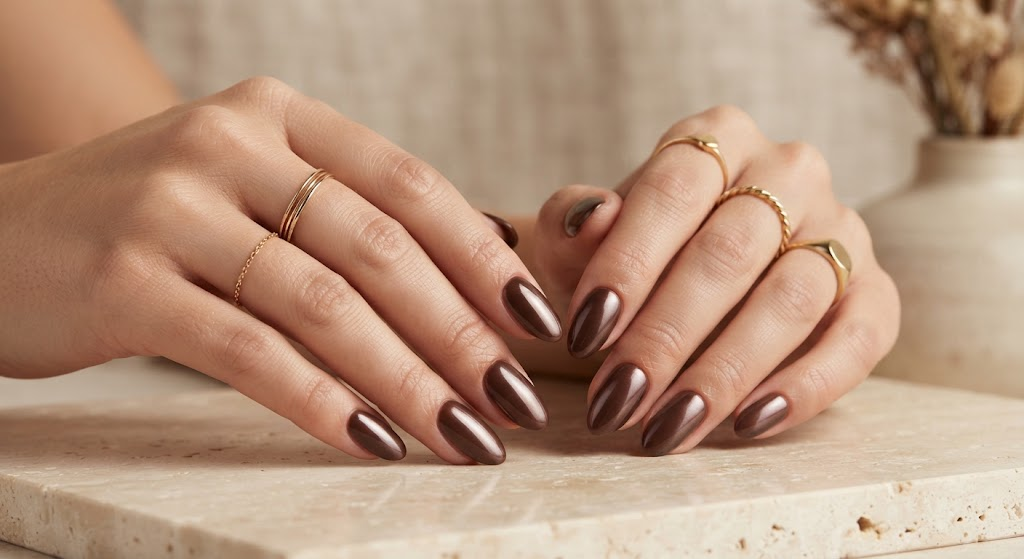
For a glazed effect, start with a smooth chocolate base and apply a very fine layer of neutral pearl chrome. Avoid heavy metallic powder, which can hide the richness of the brown underneath. The result should look glossy and softly luminous instead of glittery. A translucent pearl finish works beautifully over warm brown because it catches light while keeping the depth of the base color. Keep the nail surface very smooth before you apply the chrome, since bumps and ridges will show clearly in the shiny finish. This is a good pick for evenings and special occasions.
12. Chocolate Floral Details
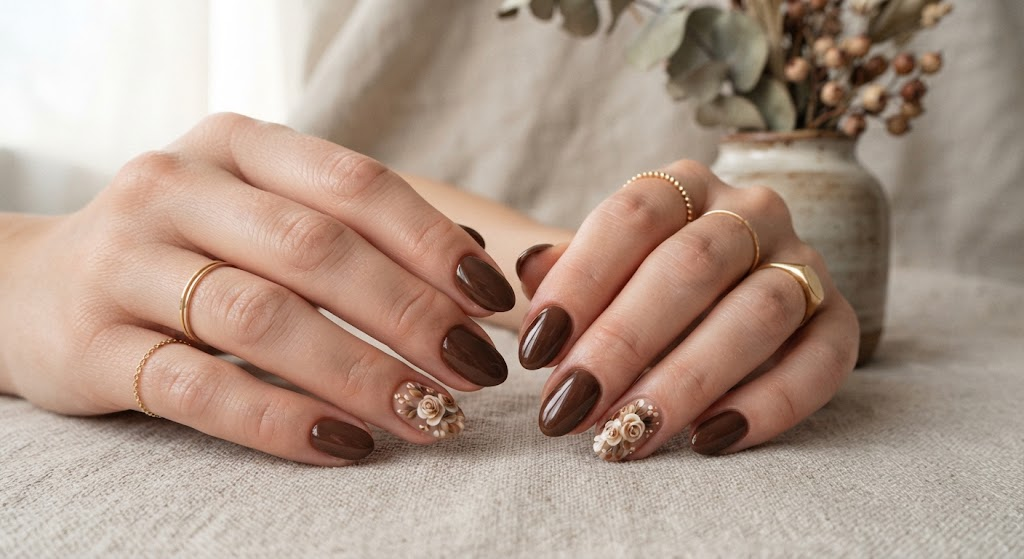
A solid brown manicure can feel plain when you want a little more decoration, but large floral art can crowd short nails. Small cream and caramel flowers fix both problems by adding detail while leaving plenty of brown visible. Use tiny five petal flowers on one or two accent nails instead of repeating them across the whole set. A fine detailing brush makes the petals easier to control. For soft contrast, pick creamy beige instead of bright white, then add a tiny brown or caramel center to link the flowers with the base color. This feminine look suits spring outfits and daytime events.
13. Chocolate Swirl Tips
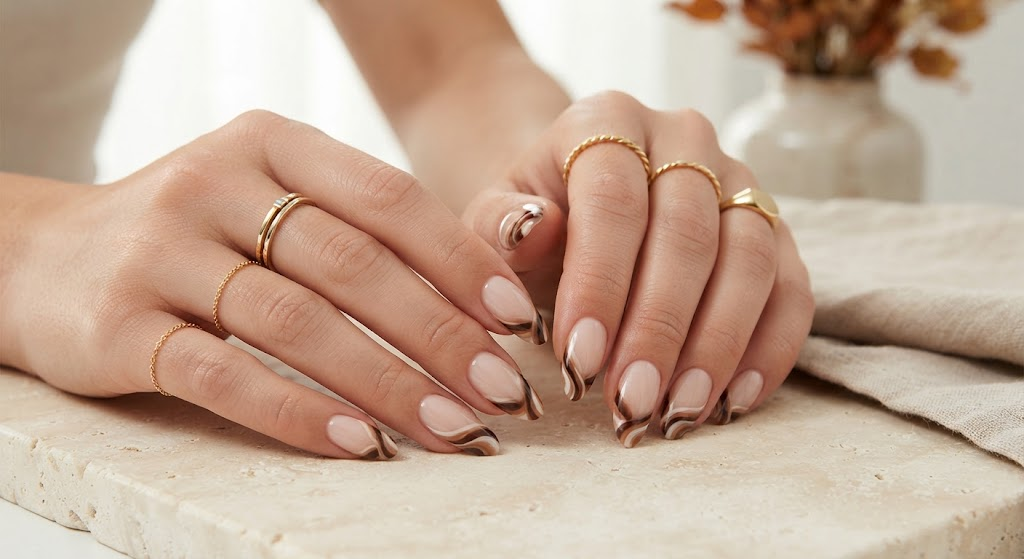
- Choose the base: Apply two thin layers of sheer nude or milky polish and let them dry fully.
- Map the tips: Place curved chocolate lines near the free edge, keeping the curves varied instead of identical.
- Add contrast: Layer thin mocha, caramel, and cream lines beside the darkest brown.
- Finish: Clean the edges with a small brush and seal everything with glossy top coat.
Swirled tips make a neutral manicure feel more artistic without needing full nail artwork. The curved lines follow the nail shape naturally, which helps longer nails look even more elongated. If you are a beginner, start with two brown shades and one cream shade, then add caramel for extra depth once the lines feel comfortable. This design suits long almond and coffin nails best. Avoid rushing the base, since wet nude polish will smudge when you draw the swirls on top.
14. Brown and Gold Foil
| Feature | Option A: Minimal Foil | Option B: Statement Foil |
| Brown base | Medium mocha | Deep chocolate |
| Gold amount | Small flakes | Larger accents |
| Placement | One or two nails | Several accent nails |
| Overall effect | Subtle | Glamorous |
Chocolate brown and gold make a warm pairing that works beautifully for evenings, celebrations, and cooler seasons. Minimal foil keeps the manicure refined, while larger flakes add more visual impact. Press the foil onto a slightly tacky surface instead of dragging it across the polish, then finish with top coat to smooth the texture. Gold foil pairs naturally with gold rings and bracelets, so it is a strong pick for weddings and parties. Avoid placing big flakes near the cuticle, where they can lift and peel early.
15. Cocoa Checkerboard Nails
DO:
- Use chocolate brown and creamy beige for strong contrast.
- Keep the squares small and evenly spaced.
- Alternate the checkerboard pattern with solid brown nails.
- Use striping tape if freehand lines feel difficult.
DON’T:
- Make every nail heavily patterned.
- Choose two shades that are too similar.
- Apply thick polish inside tiny squares.
- Skip the top coat after the design dries.
Checkerboard nails add a playful edge to rich brown polish while keeping the whole palette neutral. The pattern looks especially striking on medium or long square nails because the flatter surface gives the squares more room. This design works best when only two or three nails carry the pattern and the rest stay solid brown. It suits women who like bold nail art with colors that still match everything. Avoid shades that are too close in tone, since the squares will blur together and the pattern will be hard to see.
16. Espresso Cat Eye
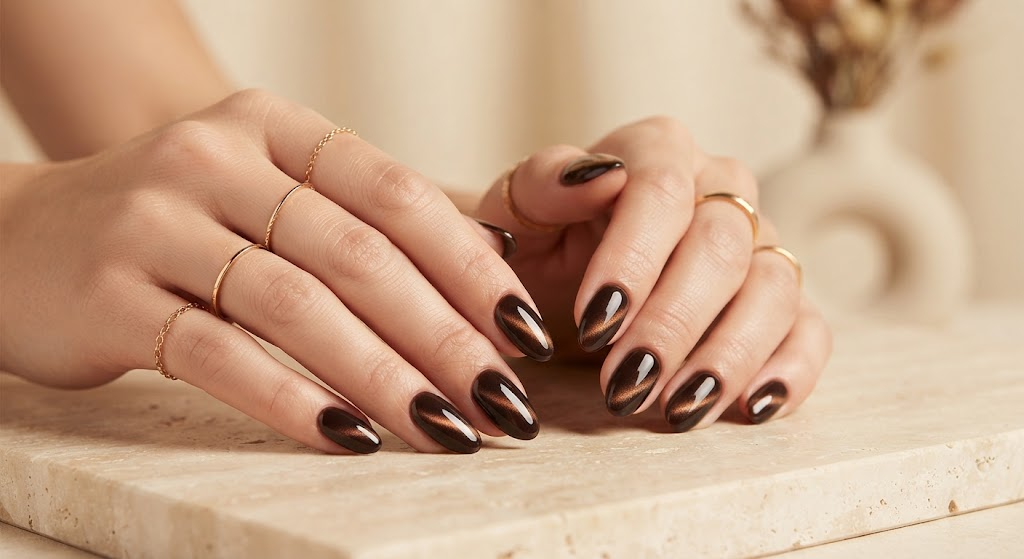
Cost: Moderate. Time: 45 to 60 minutes. Skill level: Intermediate. Best for: Almond and oval nails.
The magnetic cat eye effect gives dark brown polish much more depth than a standard glossy finish. As your hands move, the reflective stripe shifts with the light, so the manicure looks different from every angle. For a softer result, choose bronze brown magnetic polish instead of an almost black espresso shade. Work one nail at a time and hold the magnet steady, since a shaky hand makes the stripe look blurred. This is a good pick for evenings, when the moving shine shows best under warm light.
17. Brown Aura Nails
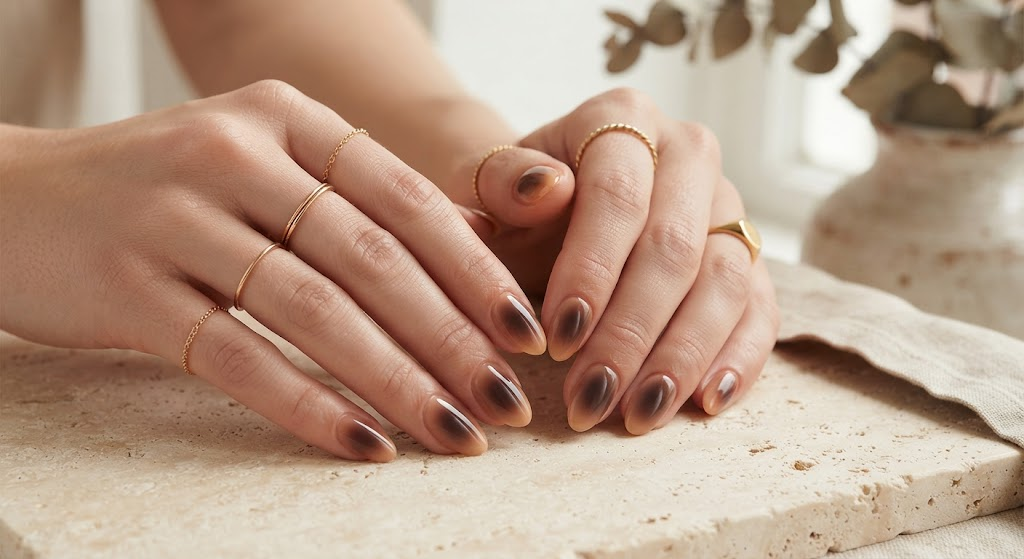
The soft center to edge gradient gives aura nails their signature blurred look. A rich brown center surrounded by nude or caramel creates depth without harsh lines, so the manicure feels soft and dimensional. For a cleaner gradient, apply the darker shade in thin layers instead of trying to build the whole center at once. Slightly different aura placements on each nail make the finished set feel more natural. Keep the surrounding nails consistent in color so the blurred effect stays the main detail. This dreamy style suits medium length nails and works well for both everyday wear and special occasions.
18. Chocolate French Almonds
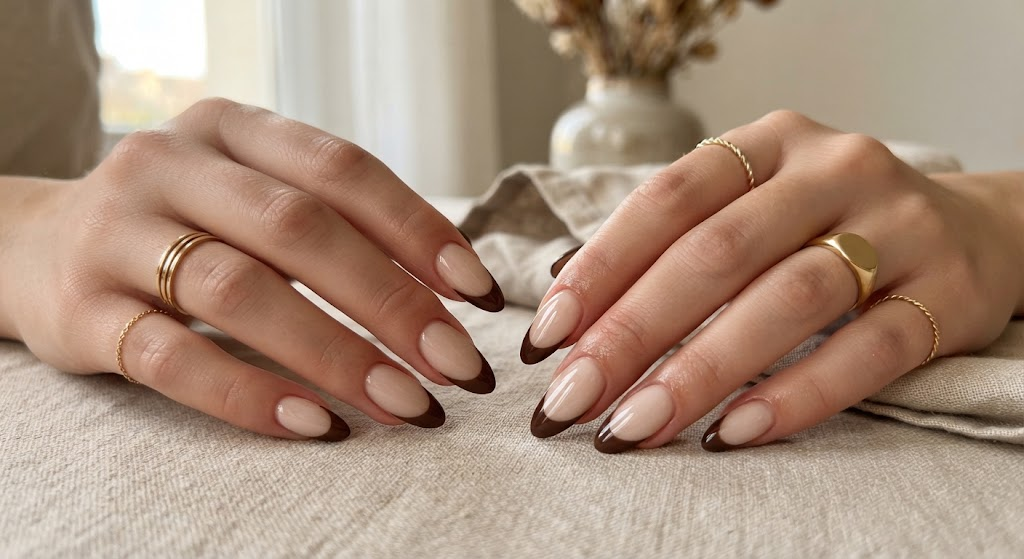
Let the nude base dry fully before you paint the brown tips. Use a French guide or fine brush to create a smooth curve, then check both sides of each nail before you seal the design. A deep brown French tip looks especially elegant on almond shaped nails because the curved edge follows the natural silhouette. The design also lets you wear a darker color without covering the whole nail. For everyday styling, pick a sheer pink nude base, and for autumn outfits, a warmer beige base adds extra richness. Avoid painting the tips too wide, since thick tips can make almond nails look heavy.
19. Mocha Glitter Accents
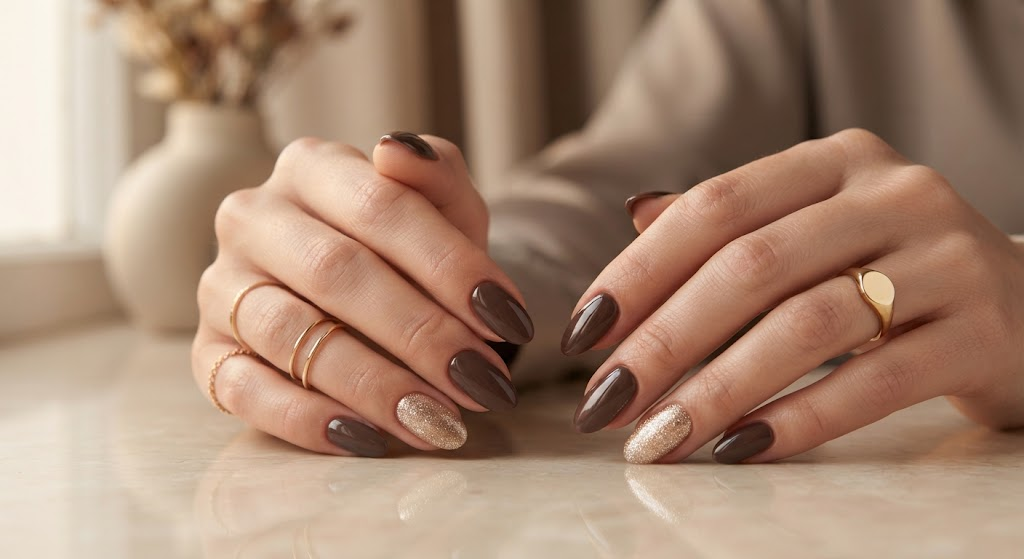
Best for: Evening events, dinners, and festive outfits. Finish: Glossy with fine champagne shimmer. Color pairing: Mocha brown and warm gold. Skill level: Beginner to intermediate.
A touch of fine glitter adds light to a deep brown manicure without taking away from its richness. Keep the sparkle on one or two nails for a balanced finish. Fine champagne glitter blends more naturally with chocolate tones than chunky silver glitter, especially with gold jewelry or warm neutral clothing. This is an easy way to dress up a plain brown manicure for a party without redoing the whole set. Avoid glitter on every nail, since a full sparkle set can hide the warm brown color you started with.
20. Deep Chocolate Nails
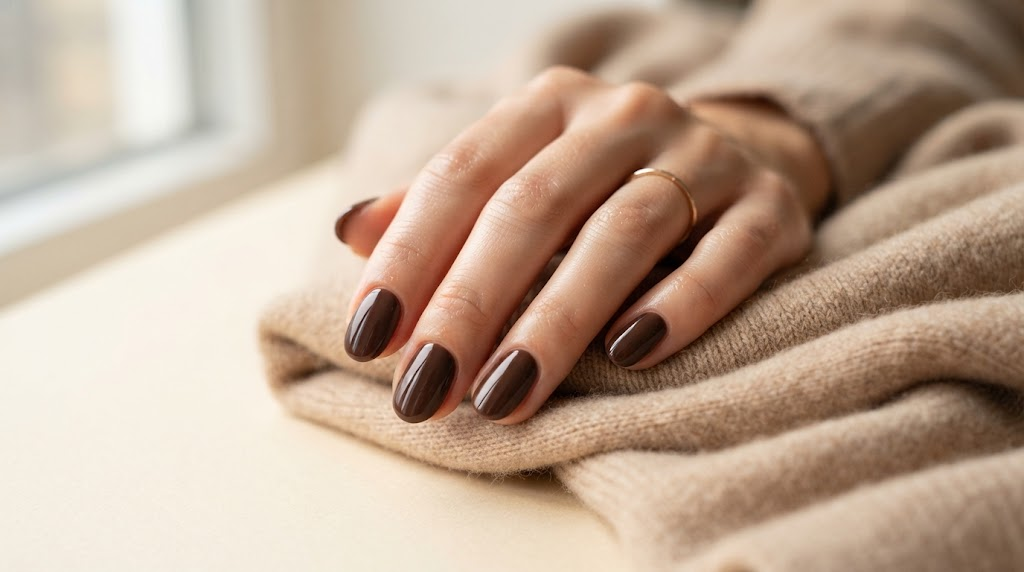
Deep chocolate polish is the finishing touch for anyone who loves a classic manicure with more warmth than black. The rich shade works across short, medium, and longer nails, which makes it one of the easiest brown styles to recreate at home or at the salon. For the cleanest result, prep the cuticles carefully and apply two thin coats. A glossy top coat brings out the depth of the color and protects the edges from everyday wear. This simple finish pairs easily with neutral clothing, denim, camel coats, and gold accessories, so it fits almost any outfit in your closet.
CONCLUSION
Chocolate brown nails give you plenty of room to experiment while staying polished and easy to wear. You can keep things simple with glossy cocoa or matte espresso polish, add interest with French tips, outlines, and swirls, or choose marble, chrome, velvet, floral, and glitter details for something more decorative. The best design is the one that fits your style, your nail shape, and your everyday routine, so start with the idea that feels most like you.
Even a small detail can change a familiar brown manicure completely. A thin brown tip, a touch of gold foil, or a soft shimmer on one accent nail is often all it takes to make the look feel new. Save this post on Pinterest so you can return to these ideas before your next manicure, pick a favorite, try it yourself, and share this collection with someone who loves beautiful nail inspiration.
As an Amazon Associate I earn from qualifying purchases.
Shop These Styles
- Chocolate Brown Gel Polish Set (Mocha and Caramel Shades) – Shop on Amazon
- Gold Foil Nail Flakes for Brown and Gold Designs – Shop on Amazon
- Matte Top Coat Gel – Shop on Amazon
Loved this post?
Follow me on Pinterest for fresh ideas every day.
Written by Zohana
Fashion Enthusiast & Capsule Wardrobe Curator
I share easy outfit ideas, hair looks, and beauty tips. I hope you find something you love.
forumComments (1)
[…] With regular care, this manicure can stay neat for two weeks or more. If you like warm tones, these chocolate brown nail designs include brown French tips worth a […]