
20 Milky White Nail Designs to Save
By Zohana • October 4, 2026 • 11 min read

format_list_bulletedTable of Contents
Quick Navigation- 1. Glossy Pearl Finish
- 2. White French Tips
- 3. Chrome White Glaze
- 4. Soft Ombre Fade
- 5. Tiny Gold Accents
- 6. Sheer White Almonds
- 7. Pearl Tip Detail
- 8. Milky Pink Overlay
- 9. Minimal Silver Lines
- 10. White Marble Swirls
- 11. Milky White Coffin Shape
- 12. Frosted White Chrome
- 13. Delicate Floral Details
- 14. Pearl Stud Accents
- 15. Glossy White Shorties
- 16. White Chrome French
- 17. Milky White Glitter
- 18. Nude White Gradient
- 19. Soft White Cat Eye
- 20. Milky White 3D Pearls
Milky white nails have that rare mix of softness, polish, and versatility that makes them easy to wear again and again. These Milky White Nail Designs bring fresh inspiration for your next manicure, whether you love short natural nails, elegant almond shapes, glossy finishes, or delicate details.
Finding the right white manicure can be surprisingly tricky. Bright white may feel too bold, while sheer polish can sometimes look too plain. A creamy milky finish gives you more room to play with shape, shine, chrome, pearls, French tips, florals, and subtle accents. I’ve noticed that these softer white tones also photograph beautifully in natural light, which makes them especially appealing for Pinterest inspiration.
Inside, you’ll find 20 wearable ideas to save for salon appointments, special events, weddings, or your next at-home manicure.
1. Glossy Pearl Finish

A glossy pearl finish gives milky white nails a soft reflective quality without looking overly sparkly. The translucent base lets a hint of natural nail show through, creating that clean salon effect. Keep the polish slightly sheer for a more delicate result, especially if you prefer understated manicures.
For extra shine, finish with a high-gloss top coat and let each layer dry properly. I’ve noticed this style photographs especially well near natural light because the pearl effect catches brightness without becoming harsh. It works beautifully with gold rings, cream outfits, wedding guest dresses, and simple everyday styling.
2. White French Tips
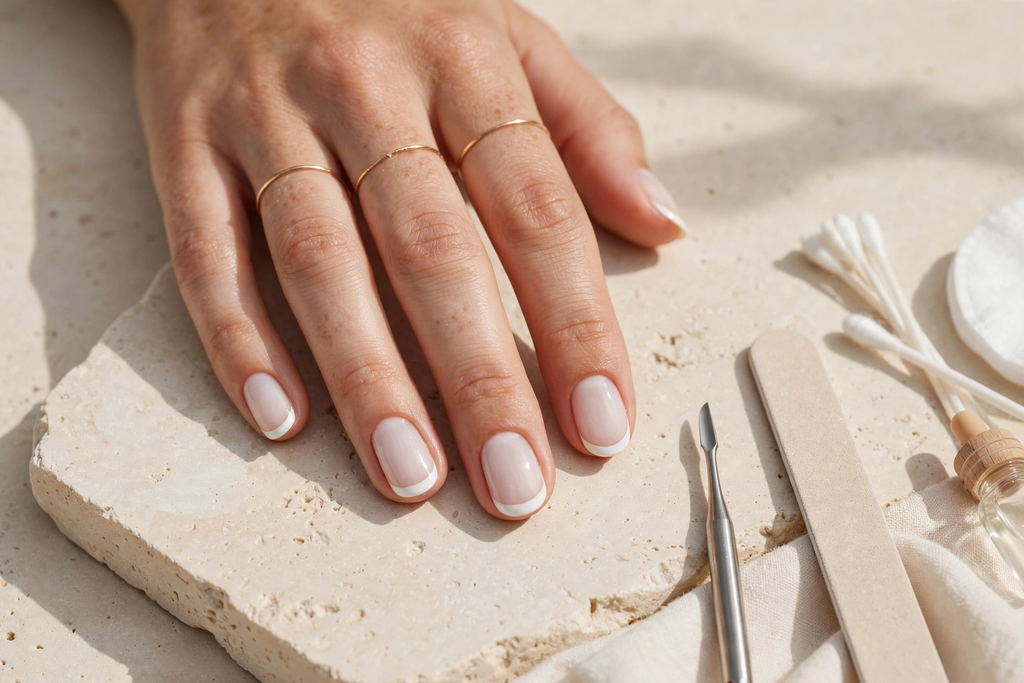
- Start with a thin milky base instead of an opaque white layer.
- Keep the French tips narrow for a modern appearance.
- Follow the natural curve of each nail when painting the tips.
- Add a glossy top coat to smooth the finish.
- Use a fine detail brush for cleaner edges.
The contrast between the sheer base and brighter tips creates a fresh French manicure with a softer feel. For shorter nails, keep the white line slim so the nail does not appear visually crowded. This combination is especially easy to coordinate with workwear, casual outfits, and bridal accessories.
3. Chrome White Glaze
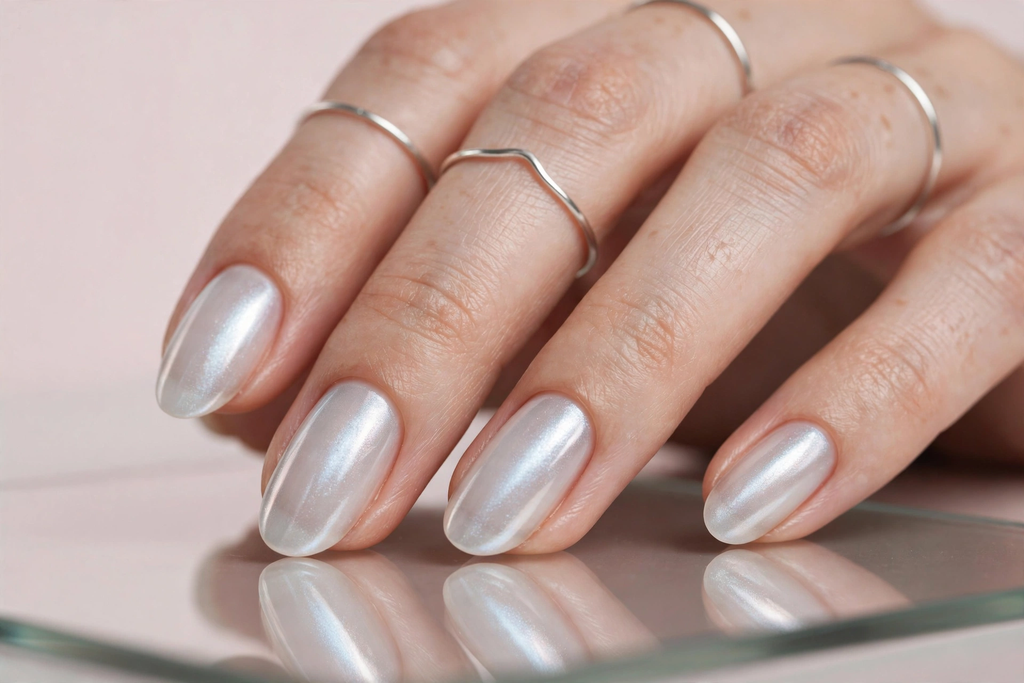
Quick Tip:
Apply chrome powder over a fully cured milky base rather than directly onto wet polish. Use a very fine layer of powder so the reflective finish stays soft and pearly instead of looking metallic.
The result is a luminous glazed manicure that shifts gently under different lighting. I’ve seen this finish work particularly well on almond and coffin shapes because the longer surface gives the reflective layer more room to catch light. Keep the rest of your accessories simple so the nails remain the main detail.
4. Soft Ombre Fade
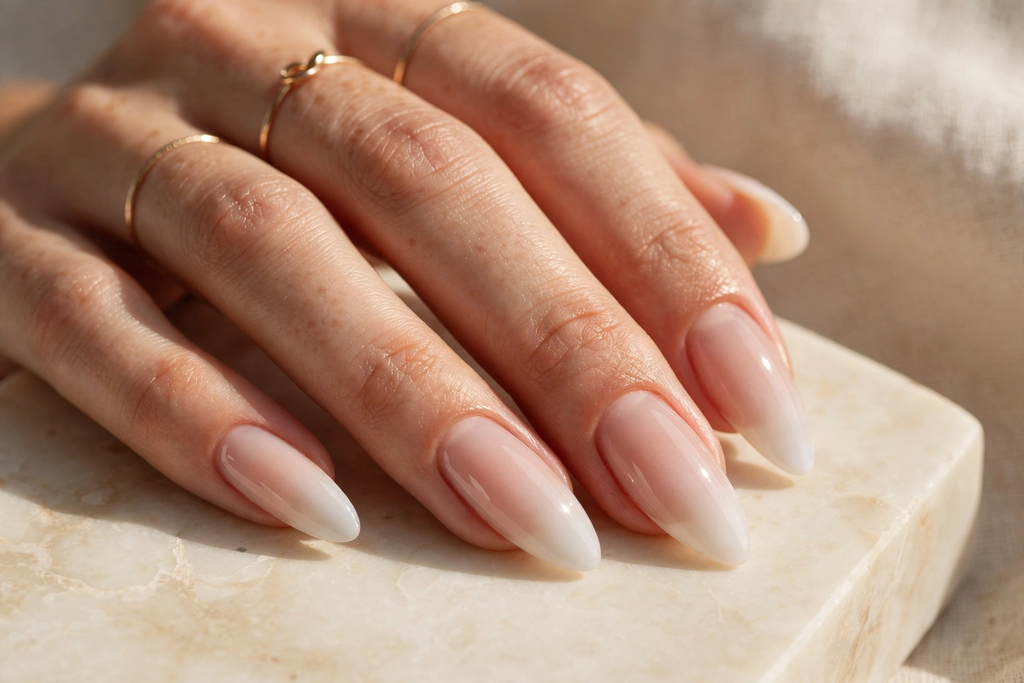
BEFORE: A solid white manicure can sometimes look too stark against warm skin tones. The contrast may also feel heavier when the nails are longer.
AFTER: A gradual fade blends the nude base into creamy white tips. The transition looks softer and helps create the appearance of longer, refined nails.
The key is keeping the color transition gradual rather than creating a visible line. Ask for a sheer base and build the white slowly toward the tips. This style suits almond and coffin shapes particularly well, especially for weddings, engagement photos, or polished everyday outfits.
5. Tiny Gold Accents
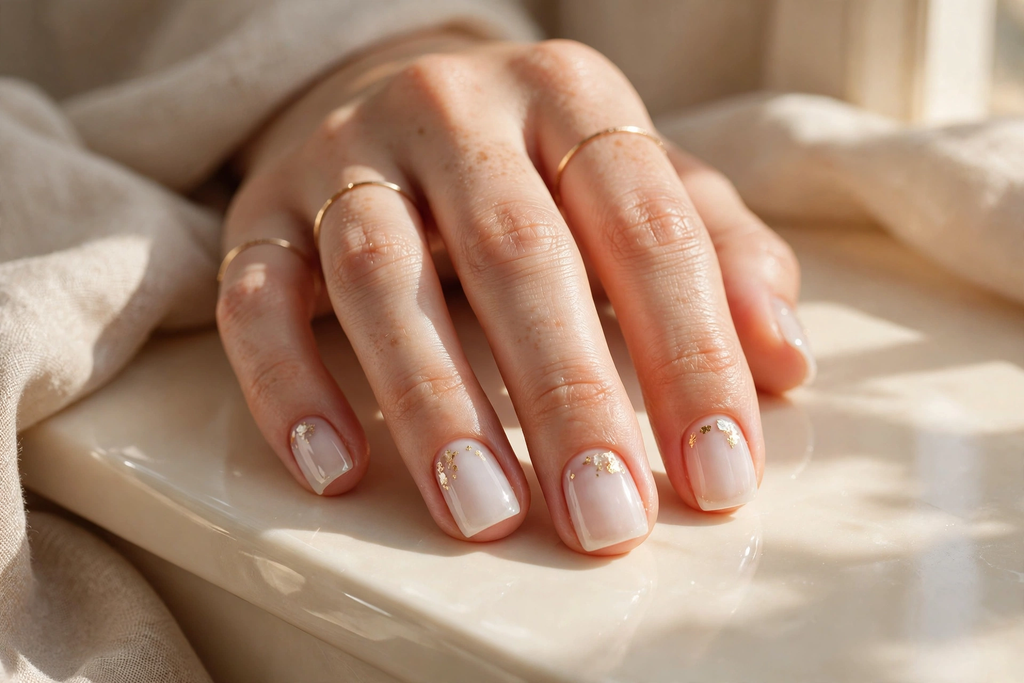
- Apply two thin layers of translucent white polish.
- Let the base cure completely before adding decoration.
- Place one or two tiny gold foil pieces near selected cuticles.
- Press the foil gently into the surface without covering the entire nail.
- Seal everything with a glossy top coat.
Small details keep this manicure sophisticated rather than busy. Choose gold foil, tiny metallic dots, or ultra-thin lines and place them on only a few nails. I’ve noticed that limiting decoration to two or three fingers creates a more intentional look while keeping the creamy base visible.
6. Sheer White Almonds

| Feature | Option A: Sheer White | Option B: Opaque White |
| Coverage | Light and translucent | Full and solid |
| Appearance | Soft and natural | Crisp and bold |
| Maintenance | Subtle regrowth | More noticeable regrowth |
| Best Shape | Almond or oval | Square or coffin |
Sheer white works especially well when you want your natural nail line to remain slightly visible. The translucent layers create depth without making the manicure look heavy. Keep the almond shape gently tapered and avoid excessive length if you want a practical finish that remains comfortable for typing and daily tasks.
7. Pearl Tip Detail

DO:
- Keep the base sheer enough to show natural depth.
- Concentrate pearl shimmer toward the nail tips.
- Use a glossy top coat to preserve the reflective finish.
- Choose almond or oval shapes for a softer silhouette.
DON’T:
- Cover the entire nail with heavy glitter.
- Mix several metallic colors into the same manicure.
- Apply thick layers that hide the natural nail.
- Skip the top coat after adding shimmer.
The pearl tip catches light gently while keeping the overall manicure clean. A fine chrome or pearl powder can create this effect without chunky particles. I’ve noticed that placing the shimmer mainly near the tips makes shorter nails appear more elongated while keeping the design suitable for everyday wear.
8. Milky Pink Overlay

Coverage: Sheer with two to three thin layers
Color Mix: Milky white with a blush pink undertone
Skill Level: Beginner friendly
Best For: Everyday wear, office looks, weddings
Finish: High gloss and softly translucent
A blush undertone gives creamy white polish a warmer, healthier appearance. It also works nicely when your natural nails have uneven color because the sheer layers visually soften small differences. Keep the pink subtle rather than saturated. The finished manicure should read as creamy white first, with a delicate rosy tint underneath.
9. Minimal Silver Lines

Fine silver lines add structure without overwhelming a soft white base. Start with three or four decorated nails rather than covering every finger, then repeat the same line direction for consistency. A striping brush gives the cleanest result, while silver nail tape can help beginners create sharper edges with less effort.
For a balanced manicure, vary the line placement slightly while keeping the thickness consistent. This design pairs naturally with silver jewelry and cool-toned clothing, but the neutral base keeps it versatile. If your nails are short, use shorter diagonal lines so the pattern does not visually divide the nail surface.
10. White Marble Swirls

- Start with a translucent milky base and cure it completely.
- Add thin ivory or soft white curved lines with a detail brush.
- Slightly blur selected lines before curing for a natural marble effect.
- Keep some nails plain to prevent the pattern from looking crowded.
- Seal the finished design with a smooth glossy top coat.
Marble detailing gives a creamy manicure more visual depth while keeping the palette neutral. The trick is irregularity. Avoid making every swirl identical because natural stone patterns rarely follow a perfect layout. Use fewer lines on shorter nails, where a simple curved detail will show more clearly.
11. Milky White Coffin Shape

Quick Tip:
Keep the coffin shape slightly tapered instead of extremely wide at the tip. File both sides evenly and maintain a straight free edge. A medium length is easier to wear daily while still giving the manicure that structured, polished appearance.
The crisp silhouette gives sheer white polish a more defined look. I’ve noticed that this combination works especially well for outfits with tailored pieces, because the straight nail edges echo structured clothing. If you use your hands frequently, choose a shorter coffin length to reduce snagging and make everyday tasks easier.
12. Frosted White Chrome
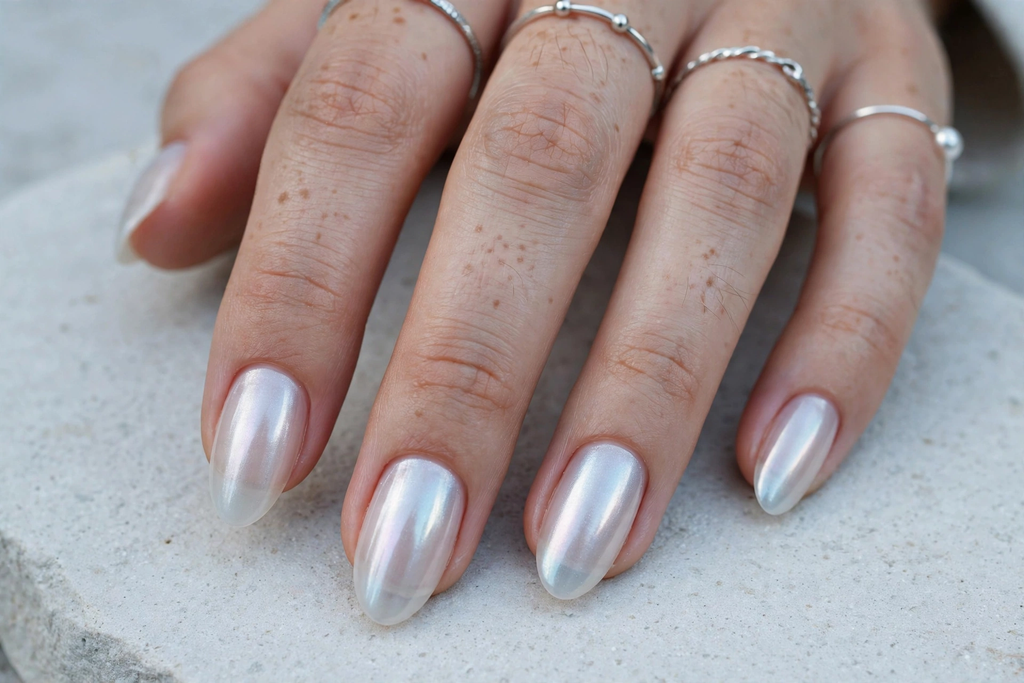
BEFORE: A plain translucent manicure can look very subtle, especially under indoor lighting. The finish may not show much dimension from a distance.
AFTER: A fine chrome layer creates a soft frosted reflection while preserving the milky base underneath. The result changes gently as the nails move through different light.
For the smoothest finish, apply chrome powder over a fully cured top coat and brush away excess powder carefully. Avoid chunky metallic products if you want a soft glazed effect. This version works particularly well for winter outfits, evening events, bridal looks, and anyone who prefers cool-toned accessories.
13. Delicate Floral Details
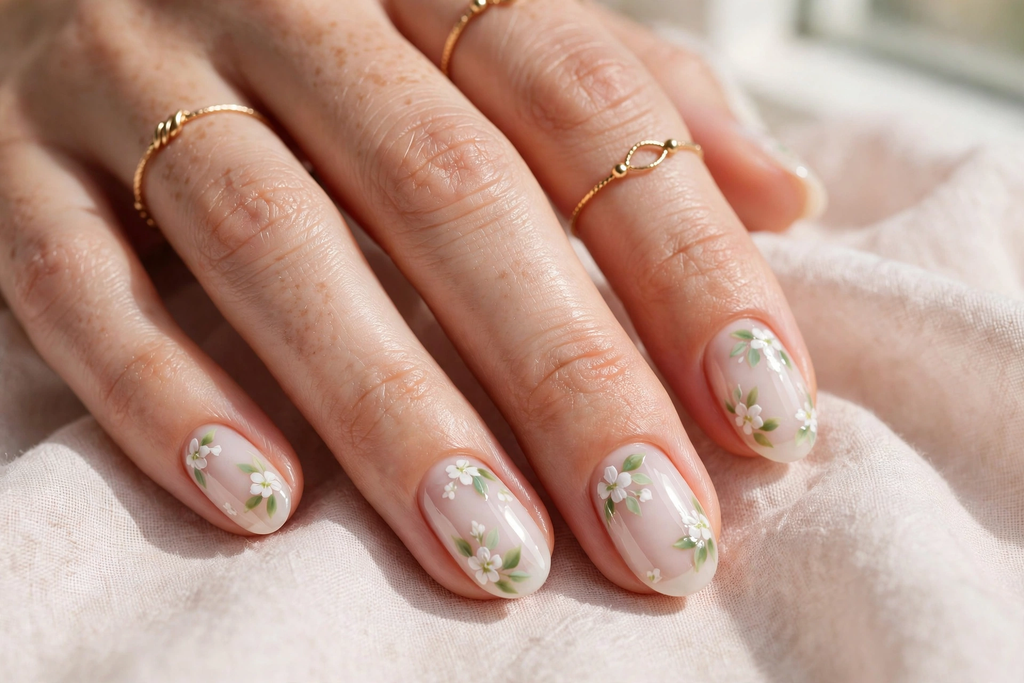
- Apply a thin milky white base and cure it fully.
- Use a fine brush to place tiny white petals on two or three nails.
- Add miniature green leaves with a muted sage polish.
- Keep the flowers spaced apart so the base remains visible.
- Finish with a glossy top coat to protect the artwork.
Tiny florals bring a soft seasonal detail to a neutral manicure without making it overly decorative. Choose small five-petal flowers for easier application and use a dotting tool for consistent centers. I’ve found that placing flowers near the sidewall or tip creates a more delicate appearance than covering the whole nail.
14. Pearl Stud Accents
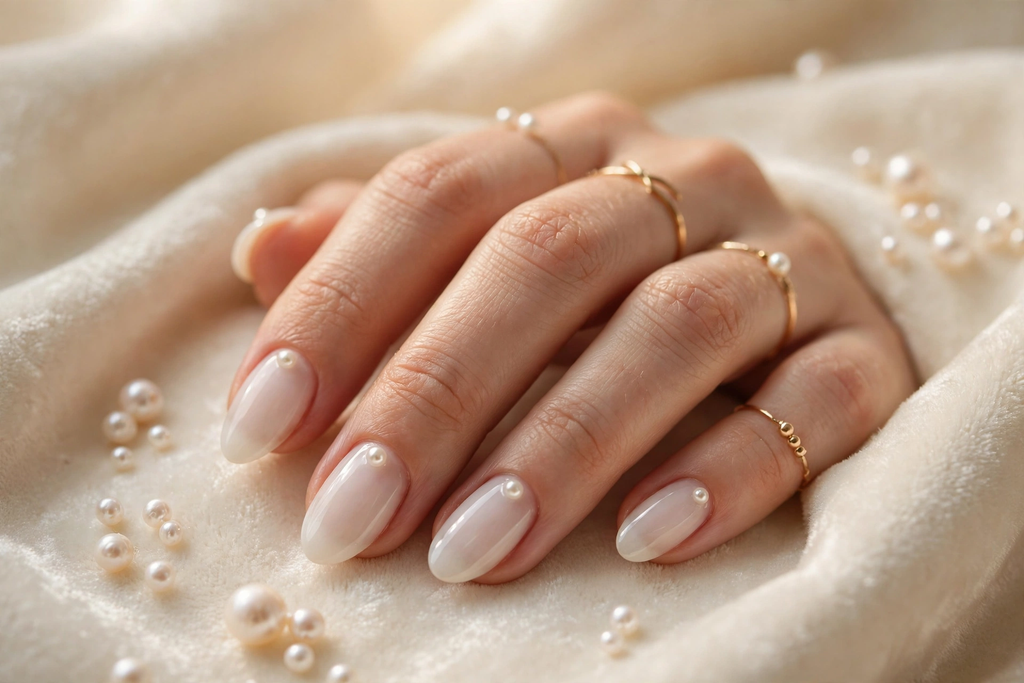
| Detail | Option A: Tiny Studs | Option B: Larger Pearls |
| Visual Effect | Subtle and delicate | More noticeable |
| Comfort | Easy for daily wear | Can catch on fabrics |
| Best Length | Short to medium | Medium to long |
| Style | Minimal bridal | Statement occasion |
Tiny pearl studs add dimension while keeping the creamy base visible. For everyday wear, choose miniature flat-back embellishments and secure them with nail adhesive or builder gel. Larger pearls are better reserved for events where the extra texture is worth the reduced practicality. Always seal carefully around the edges.
15. Glossy White Shorties
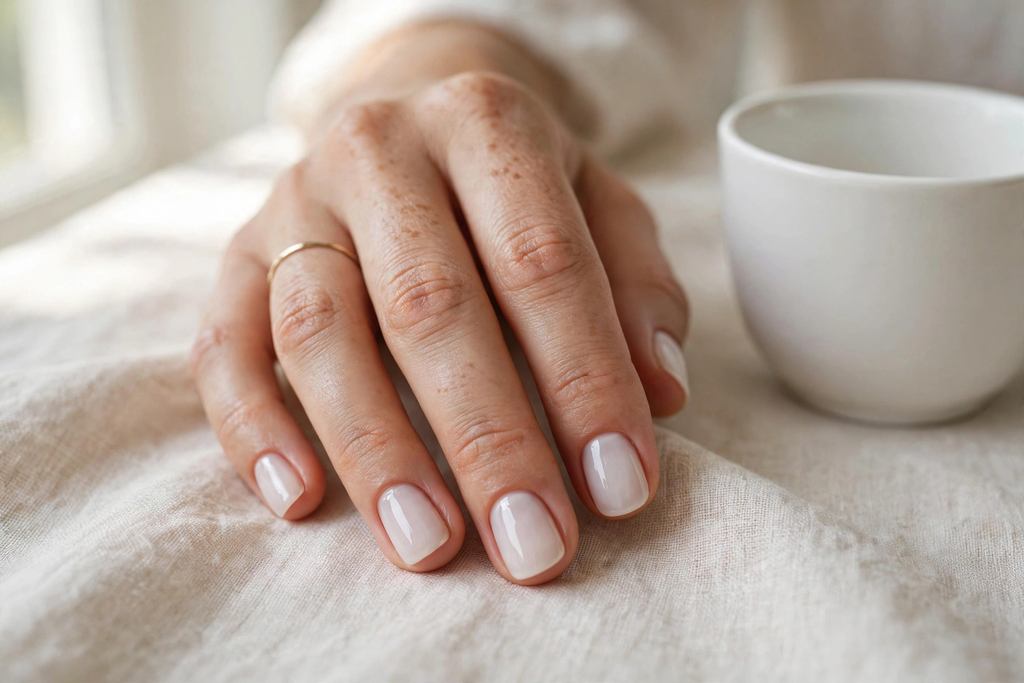
DO:
- Keep the free edge short and evenly shaped.
- Use thin polish layers to prevent bulk.
- Clean the cuticle area carefully before curing.
- Add a durable glossy top coat.
DON’T:
- File the corners too sharply.
- Apply thick coats near the cuticle.
- Overload the nails with large decorations.
- Ignore chips at the free edge.
Short nails can still create a polished, elegant look with the right finish. A sheer white layer keeps the manicure light while a rounded-square shape gives it enough structure for everyday wear. This option is especially practical for typing, cooking, working with your hands, or anyone who prefers low-maintenance nail length.
16. White Chrome French
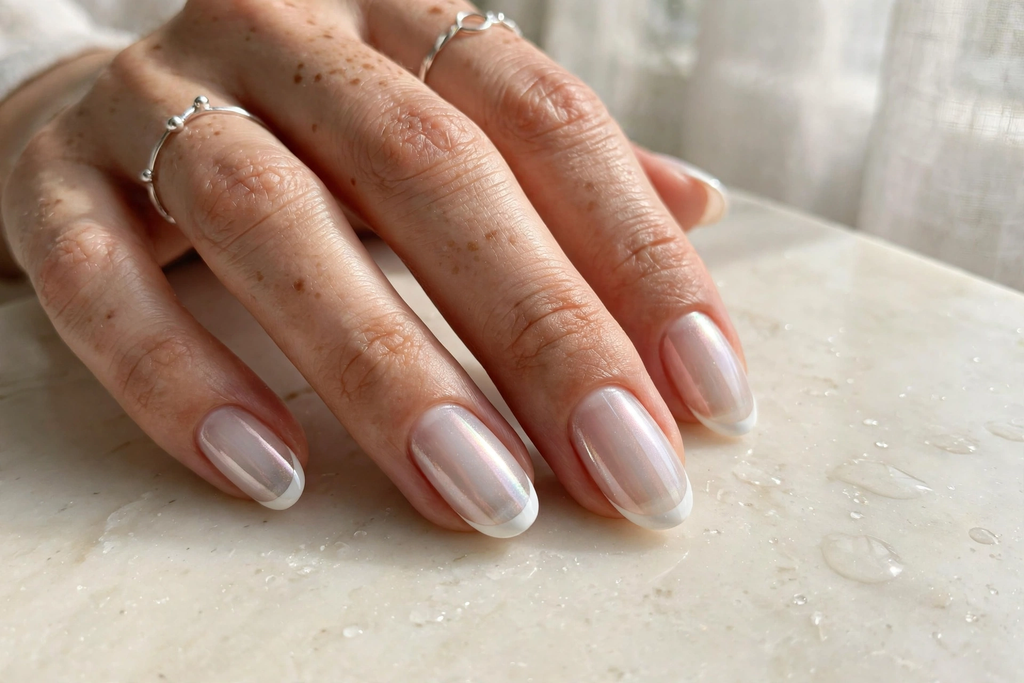
Cost: Low to moderate, depending on salon technique
Time: About 45 to 60 minutes
Skill Level: Intermediate
Best For: Weddings, parties, date nights, polished everyday looks
Combining a French tip with a soft chrome glaze creates dimension without adding complicated artwork. Keep the white tips crisp and narrow, then apply the reflective finish lightly across the surface. The result looks especially refined on almond nails, where the curved shape complements the clean French structure.
17. Milky White Glitter

A touch of fine glitter can make a creamy manicure catch the light beautifully. Choose micro glitter rather than chunky particles if you want a sophisticated finish. Apply it over the white base while concentrating slightly more sparkle near the tips. This creates a soft gradient that feels festive without becoming overly flashy.
For a subtle version, use one glitter coat over two thin layers of milky polish. For parties or holiday events, add a second coat to selected nails. I’ve noticed that champagne or pearl glitter blends more naturally with creamy white than highly contrasting colors, especially under warm indoor lighting.
18. Nude White Gradient

| Feature | Option A: Nude to White | Option B: White to Nude |
| Starting Color | Warm beige | Milky white |
| Visual Effect | Elongated appearance | Softer tip contrast |
| Best Skin Tones | Warm and neutral | Cool and neutral |
| Maintenance | Subtle regrowth | Slightly more visible |
A nude-to-white gradient creates a gentle transition that visually lengthens the nail. Keep the nude shade close to your natural skin tone and blend the white gradually toward the free edge. This design is particularly useful when you want a polished manicure that grows out gracefully without a strong boundary at the cuticle.
19. Soft White Cat Eye

Cost: Moderate, especially with salon-applied magnetic polish
Time: About 45 to 60 minutes
Skill Level: Intermediate
Best For: Evening events, parties, winter outfits, elegant everyday looks
Result: Soft white base with a shifting pearly reflection
A magnetic polish gives the creamy base a delicate streak of light that changes as your hands move. For a softer result, choose a pearl or silver-white magnetic shade rather than a dark cat-eye color. Hold the magnet close to each nail before curing to create a defined reflective line.
20. Milky White 3D Pearls
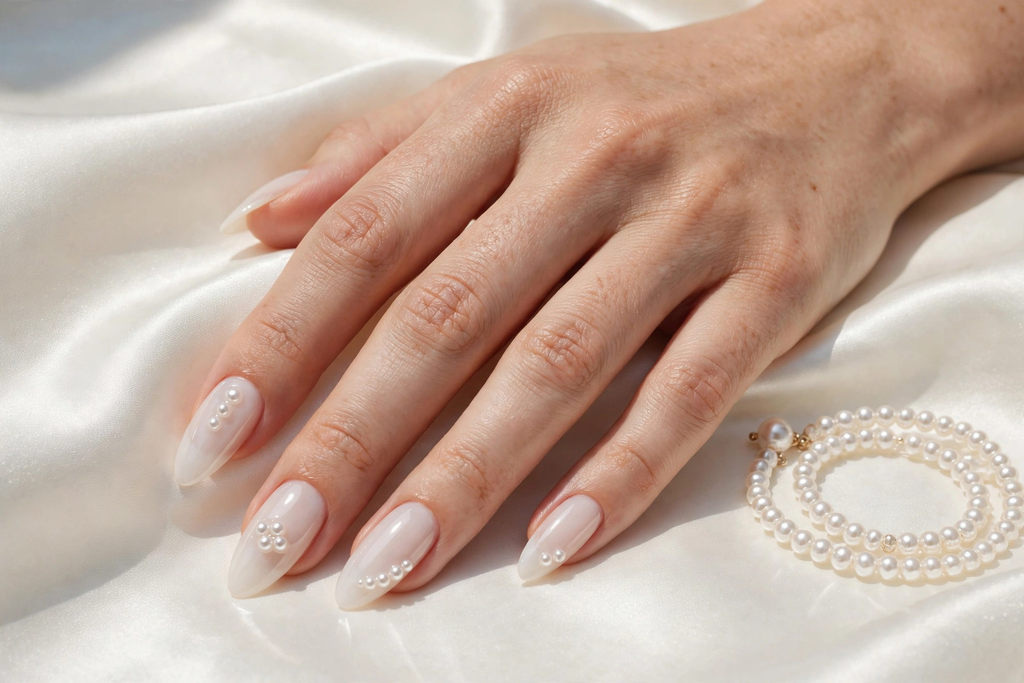
Milky white polish becomes more dimensional with a few carefully placed pearl accents. Keep the embellishments small and limit them to two or three nails so the design remains balanced. Apply them over a cured surface with nail adhesive or builder gel, then secure the edges carefully to reduce snagging.
I’ve noticed that raised details are easiest to wear when placed away from the nail tip and side edges. That small adjustment helps prevent the pearls from catching on clothing or hair. This design suits bridal celebrations, engagement photos, formal dinners, and other occasions where a little texture feels appropriate.
CONCLUSION
The right manicure does not need complicated artwork to feel polished. These Milky White Nail Designs show how small changes in finish, shape, texture, and detail can create completely different looks.
Save this post to your Pinterest boards so you can return to your favorite ideas before your next nail appointment. Try a simple glossy finish for everyday wear, or choose pearls, chrome, florals, or French tips when you want something more distinctive. I’ve noticed that having a few saved references makes it much easier to explain exactly what you want at the salon. Share this collection with someone who loves fresh nail inspiration and start planning your next look.
Loved this post?
Follow me on Pinterest for fresh ideas every day.
Written by Zohana
Fashion Enthusiast & Capsule Wardrobe Curator
I share easy outfit ideas, hair looks, and beauty tips. I hope you find something you love.
forumComments (1)
[…] perfect milky color, so do not load the brush with too much polish at once. If you love this shade, browse our full milky white nail design collection for more ways to wear […]