
24 Burgundy Nail Designs to Save
By Zohana • October 4, 2026 • Updated October 29, 2026 • 14 min read
format_list_bulletedTable of Contents
Quick Navigation- Classic Burgundy Gloss
- Burgundy French Tips
- Burgundy Chrome Nails
- Burgundy Velvet Nails
- Burgundy Almond Nails
- Burgundy and Nude
- Burgundy Tortoiseshell Accents
- Burgundy Glitter Tips
- Burgundy Floral Details
- Burgundy Ombre Nails
- Burgundy Aura Nails
- Burgundy Pearl Accents
- Burgundy Cat Eye Nails
- Burgundy Checkerboard Nails
- Burgundy Chrome French
- Burgundy Lace Details
- Burgundy Matte Nails
- Burgundy Gold Foil
- Burgundy Swirl Nails
- Burgundy French with Gold
- Burgundy Negative Space
- Burgundy Velvet French
- Burgundy Marble Nails
- Burgundy and Blush
- CONCLUSION
- Shop These Styles
Your next manicure might be hiding in these Burgundy Nail Designs. From glossy wine shades to shimmering chrome, soft blush pairings, and delicate gold details, there is plenty of inspiration to save before your next salon visit.
Choosing a nail design can be surprisingly difficult when you want something stylish but still practical enough for everyday life. A deep burgundy manicure offers a rich color that works beautifully with neutral outfits, autumn layers, evening looks, and simple gold jewelry. The right shape, finish, and accent can completely change how the color feels.
In my experience, having a few specific reference ideas makes a salon appointment much easier. These designs give you clear options to show your nail technician, whether you prefer short and understated nails or longer statement shapes. Save your favorites now and come back when you’re ready for your next set.
Classic Burgundy Gloss

A classic burgundy manicure proves that a simple color can still feel striking. The deep wine shade gives nails a polished finish without requiring detailed nail art, making it especially practical for work, dinners, and everyday outfits.
For the cleanest result, keep the shape consistent and apply two thin coats rather than one heavy layer. I’ve noticed that a high-shine top coat makes dark polish look richer and helps disguise small brush marks.
Burgundy French Tips

- Choose a sheer pink or nude base so the tips remain the focal point.
- Keep the burgundy line slightly thinner on short nails for a balanced look.
- Almond and squoval shapes work especially well with curved French tips.
- Add a glossy top coat to sharpen the contrast between nude and wine tones.
- Match the tip width across every nail for a professional finish.
French tips offer a lighter approach to dark polish while keeping the recognizable wine-colored accent. For a salon appointment, bring a reference showing the exact tip thickness you prefer. A thinner line feels delicate, while a wider tip creates a bolder manicure that stands out against neutral clothing.
Burgundy Chrome Nails
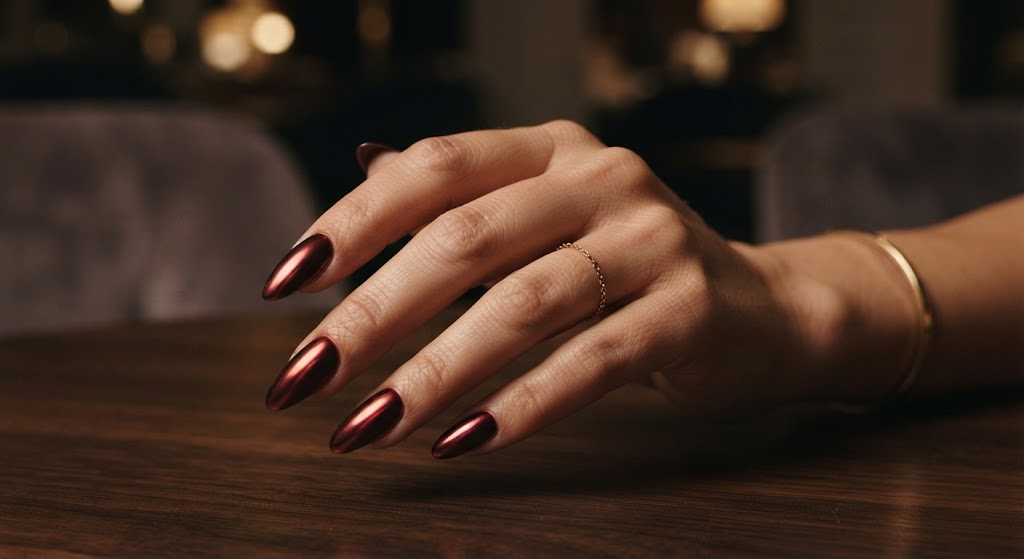
Quick Tip: Ask for a burgundy base beneath the chrome powder rather than relying on the reflective layer alone. A darker base creates more depth and keeps the manicure looking rich even as the chrome reflection changes under different lighting.
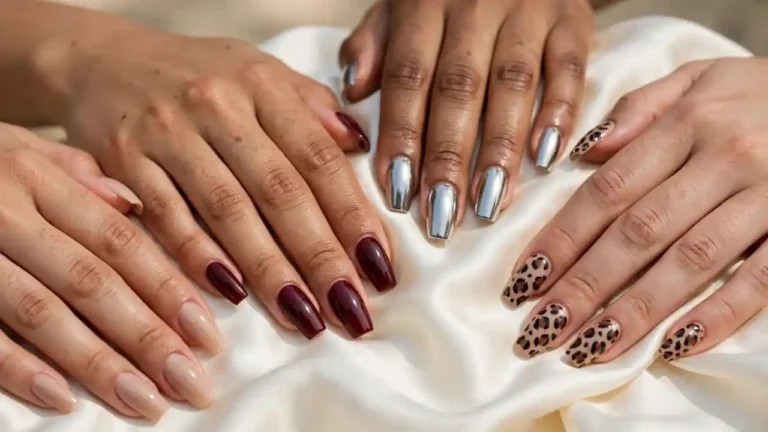
Chrome gives a traditional wine manicure a distinctly reflective finish. It works especially well on almond or coffin shapes because the elongated surface catches light from several angles. I’ve seen this finish look particularly dramatic at evening events, but a shorter length keeps it practical for everyday wear.
Burgundy Velvet Nails

BEFORE: A flat dark manicure can sometimes look heavy, especially on shorter nails or with minimal styling. The solid finish gives little variation as the hand moves under different lighting.
AFTER: A velvet effect adds soft, directional shimmer while keeping the deep wine color intact. The magnetic finish catches light across each nail, creating dimension without adding rhinestones or complicated artwork.
The effect is easiest to appreciate near a window or beneath warm indoor lighting, where the shimmer shifts as your hands move. Ask your nail technician to keep the magnetic pattern centered and subtle rather than creating a harsh stripe. This finish pairs beautifully with knitwear, satin, and simple gold jewelry.
Burgundy Almond Nails
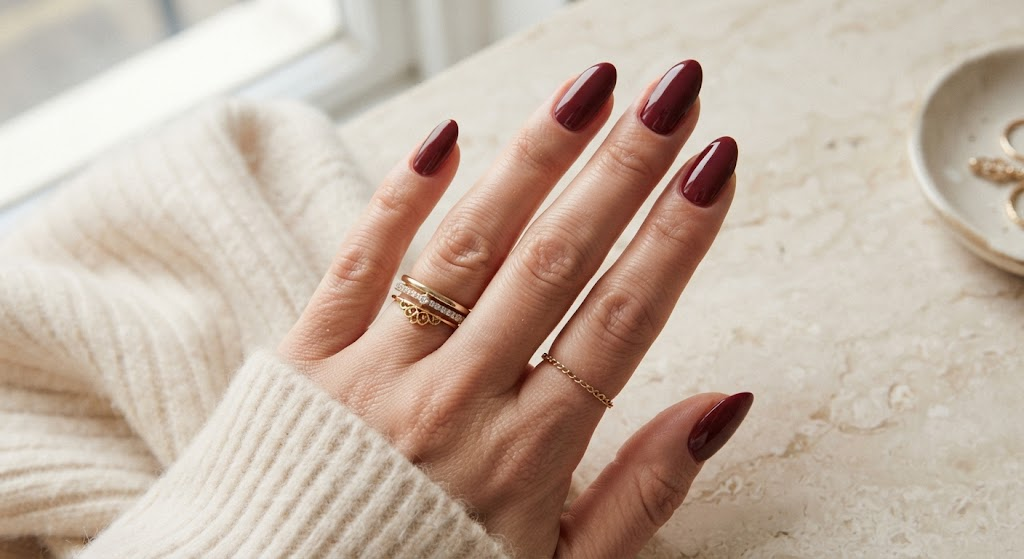
- Shape the edges: File both sides gradually toward the center to create a smooth almond silhouette.
- Refine the tip: Keep the point softly rounded rather than sharply pointed for everyday comfort.
- Apply the color: Use two thin coats of burgundy polish, allowing each layer to dry properly.
- Seal the finish: Add a glossy top coat, especially across the tip where chips often begin.
Almond nails make dark polish feel more elongated and refined because the tapered sides visually lengthen the fingers. In my experience, a medium length offers the best balance between elegance and practicality. It gives enough surface area for rich color while remaining manageable for typing, cooking, and daily tasks.
Burgundy and Nude
| Comparison Point | Option A: Full Burgundy | Option B: Burgundy and Nude |
| Visual Effect | Rich and dramatic | Lighter and more balanced |
| Maintenance | Chips are more noticeable | Nude areas help soften regrowth |
| Styling | Best with bold outfits | Easy with neutral outfits |
| Nail Art | Minimal detail needed | More room for small accents |
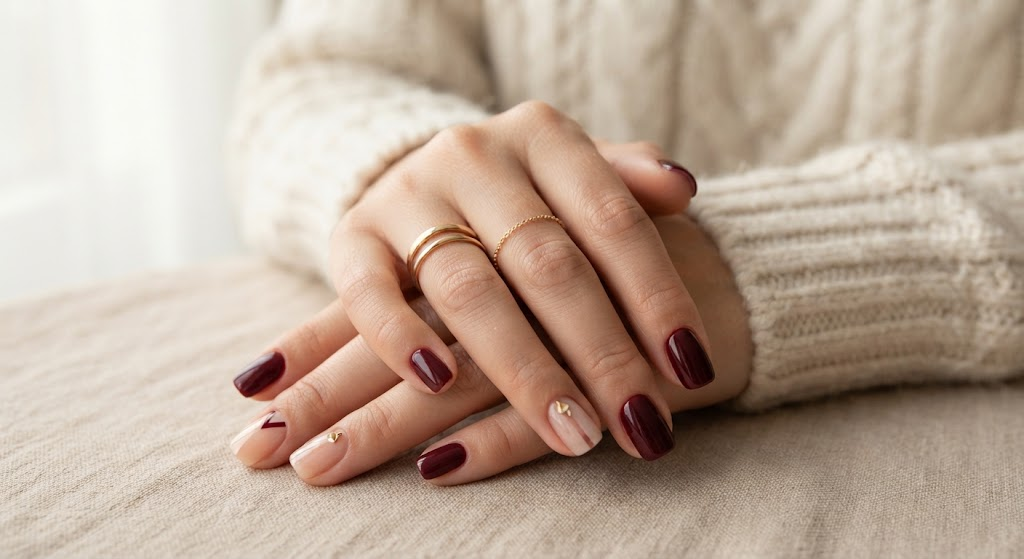
Alternating deep wine polish with a sheer nude base keeps the manicure visually interesting without making it overly detailed. The neutral sections also give your nails breathing room, which works nicely when you want color but prefer a softer overall appearance. Keep the nude shade close to your natural skin tone for a cohesive finish.
Burgundy Tortoiseshell Accents
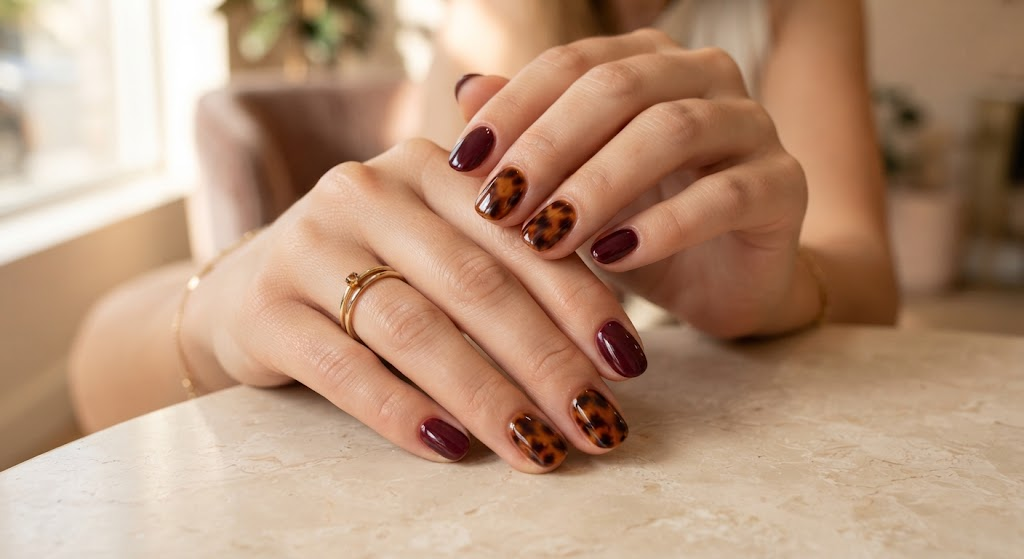
DO:
- Keep most nails solid burgundy for a controlled color balance.
- Use warm caramel and brown tones in the tortoiseshell pattern.
- Finish every nail with a glossy top coat.
- Place the patterned accents on opposite hands for visual balance.
DON’T:
- Cover every nail with a busy tortoiseshell pattern.
- Mix cool gray or blue tones into the warm brown design.
- Make every accent identical in shape and size.
- Skip the final top coat on textured artwork.
The contrast between deep wine polish and warm tortoiseshell creates a sophisticated manicure with plenty of visual depth. I’ve noticed that two accent nails usually provide enough pattern without competing with the main color. This combination works particularly well with autumn outfits, brown leather accessories, cream knits, and gold jewelry.
Burgundy Glitter Tips
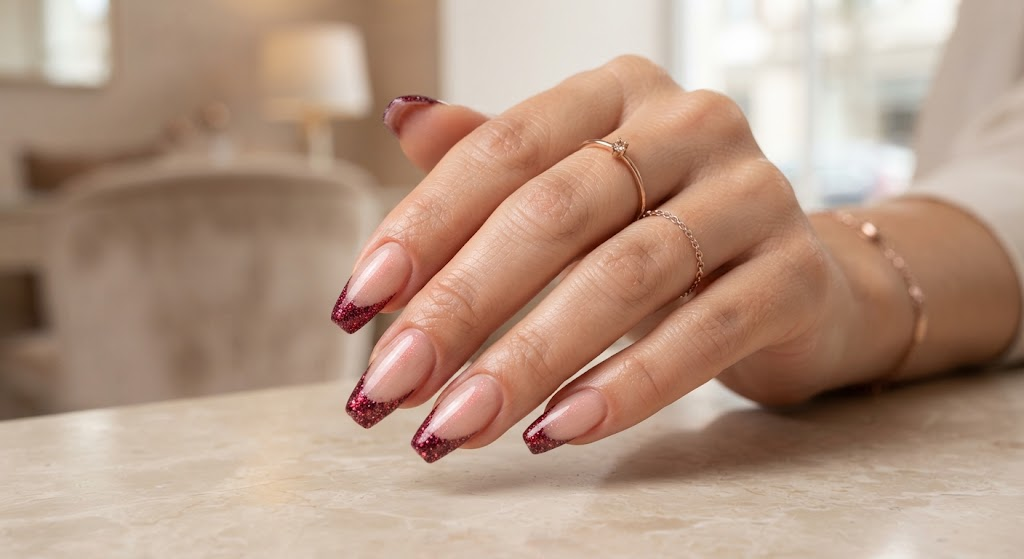
Cost: Moderate | Time: About 60 to 90 minutes | Skill Level: Intermediate | Best For: Parties and evenings
Finish: Glossy and reflective | Base: Sheer nude or pale pink | Best Shape: Almond or coffin
A touch of glitter can make deep wine tips feel festive without covering the entire nail in sparkle. Fine burgundy glitter keeps the design refined, while chunkier particles create a stronger party look. For everyday wear, choose micro-glitter and a narrow French tip that catches light without overwhelming your manicure.
Burgundy Floral Details

- Start with the base: Apply two even coats of burgundy polish and let them dry completely.
- Add petals: Use a fine nail-art brush or dotting tool to create small cream flowers on two or three nails.
- Add centers: Place tiny gold or burgundy dots in the middle of each flower.
- Finish carefully: Seal the artwork with a clear top coat to protect the raised details.
Small floral details soften the intensity of a dark manicure while keeping burgundy as the dominant shade. Keep the flowers concentrated near one corner or along the tip instead of covering the whole nail. This makes the design easier to recreate and gives the finished set a clean, salon-style appearance.
Burgundy Ombre Nails

Quick Tip: Ask for a gradual color fade instead of a sharp boundary between the two shades. A sheer nude base underneath helps the burgundy blend smoothly and makes the transition look softer as the manicure grows out.
Ombre gives dark wine polish a lighter visual finish by concentrating the strongest color toward the tips. It works especially well on longer almond nails because there is enough surface for a gradual fade. For a subtle result, choose a muted blush base rather than bright white, which can create stronger contrast.
Burgundy Aura Nails

BEFORE: A traditional single-color manicure keeps the same burgundy intensity from cuticle to tip. On some nail shapes, that can make the color feel visually dense.
AFTER: A soft aura effect places concentrated wine color toward the center and blends it outward into a translucent pink or nude background. The diffused edges create depth without requiring detailed line work.
This design is especially useful for anyone who likes burgundy but wants something softer than a solid manicure. Keep the center color slightly darker than expected because the glossy top coat can soften its appearance. I’ve noticed that rounded or almond shapes show the blurred effect particularly well.
Burgundy Pearl Accents
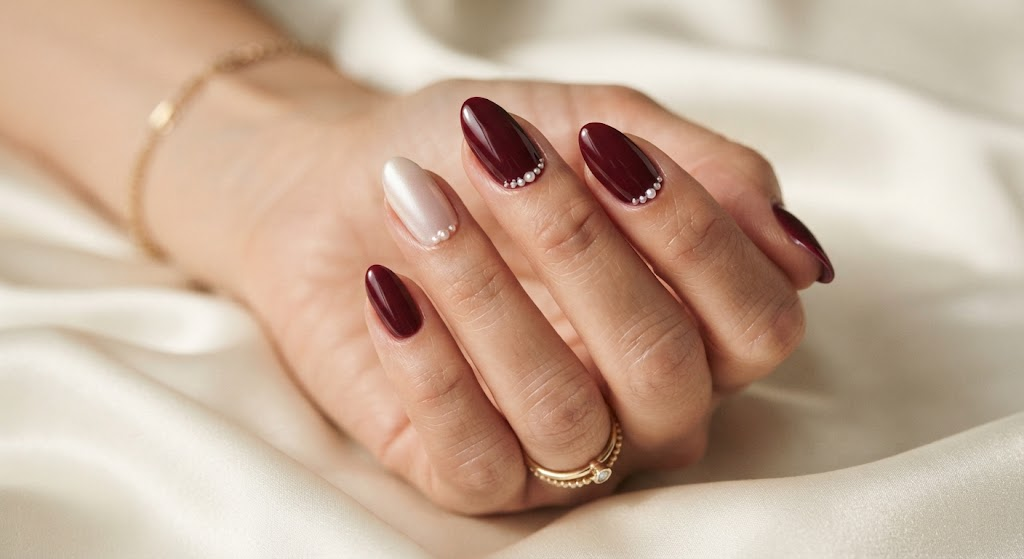
| Design Choice | Option A: Pearl Accent Nails | Option B: Pearl Embellishments |
| Main Effect | Soft contrast | Subtle dimension |
| Application | Simple color change | Small decorative details |
| Maintenance | Easier to maintain | Requires careful sealing |
| Best Style | Classic and minimal | Elegant and dressy |
Pairing burgundy with pearl details creates contrast without introducing a competing bright color. A single pearl accent nail keeps the set understated, while tiny pearls near the cuticle add a more decorative finish. Use strong nail adhesive and seal around embellishments carefully so they stay secure during everyday activities.
Burgundy Cat Eye Nails
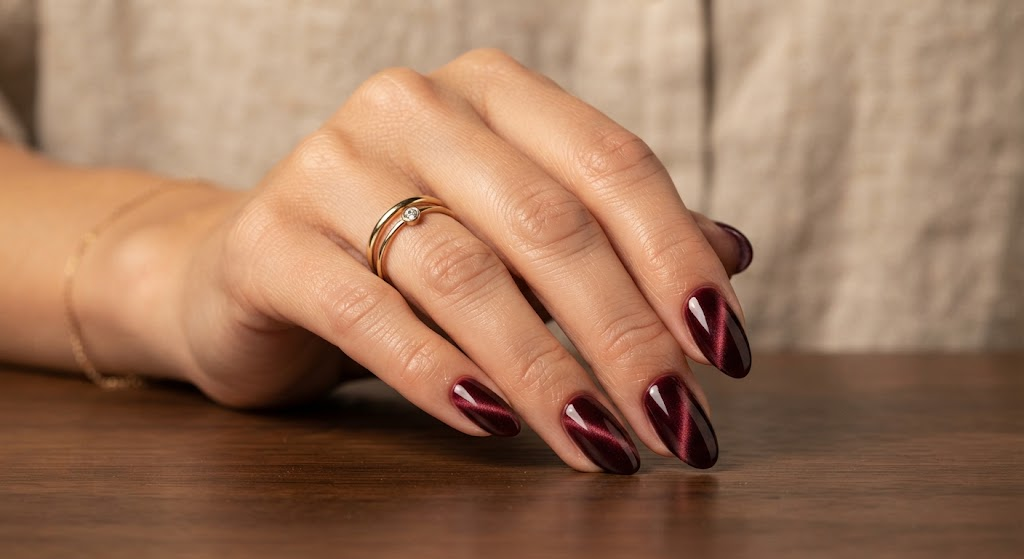
DO:
- Choose a deep wine gel polish with fine magnetic particles.
- Position the magnetic wand consistently for matching shimmer lines.
- Keep the base layer smooth before activating the magnetic effect.
- Seal the design with a glossy gel top coat.
DON’T:
- Hold the magnet too far from the nail surface.
- Create dramatically different shimmer directions on every nail.
- Apply thick polish layers that blur the reflective effect.
- Skip curing between gel layers.
Cat-eye polish adds movement to a dark manicure because the reflective stripe shifts as your hands move. A diagonal magnetic line looks especially flattering on almond nails, while a centered stripe creates a cleaner appearance. For an understated finish, use fine shimmer rather than chunky magnetic particles.
Burgundy Checkerboard Nails
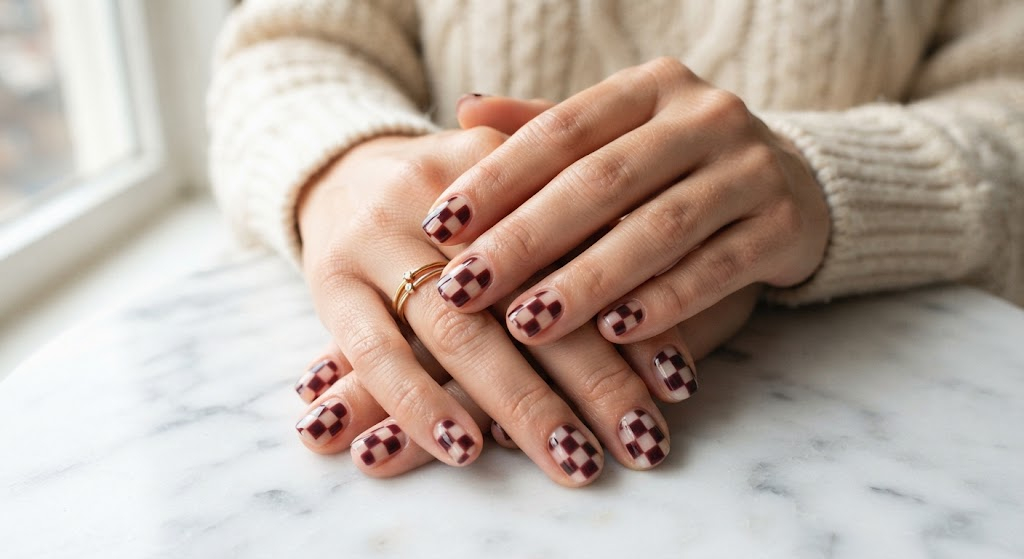
Cost: Moderate | Time: 60 to 90 minutes | Skill Level: Intermediate | Best For: Trend-focused everyday looks
Pattern: Small checker squares | Base: Sheer nude | Accent: Deep burgundy | Finish: High gloss
Checkerboard artwork gives a classic wine shade a playful geometric edge. Keeping the squares small prevents the pattern from overwhelming shorter nails, while a sheer nude background keeps the overall set light. For sharper lines, nail artists can use striping tape or a fine detail brush rather than attempting each square freehand.
Burgundy Chrome French

- Prepare the base: Shape and buff the nails, then apply a thin sheer nude or pink layer.
- Create the tips: Paint precise burgundy French tips and cure if using gel polish.
- Apply chrome: Rub fine burgundy chrome powder over the colored tips for a reflective metallic effect.
- Seal the design: Apply a compatible top coat carefully across the entire nail.
The combination of French structure and metallic wine color gives the manicure definition without covering the whole nail in chrome. Keep the natural base glossy and translucent so the reflective tips remain the main feature. This style suits evening outfits particularly well, especially black, cream, burgundy, or satin textures.
Burgundy Lace Details
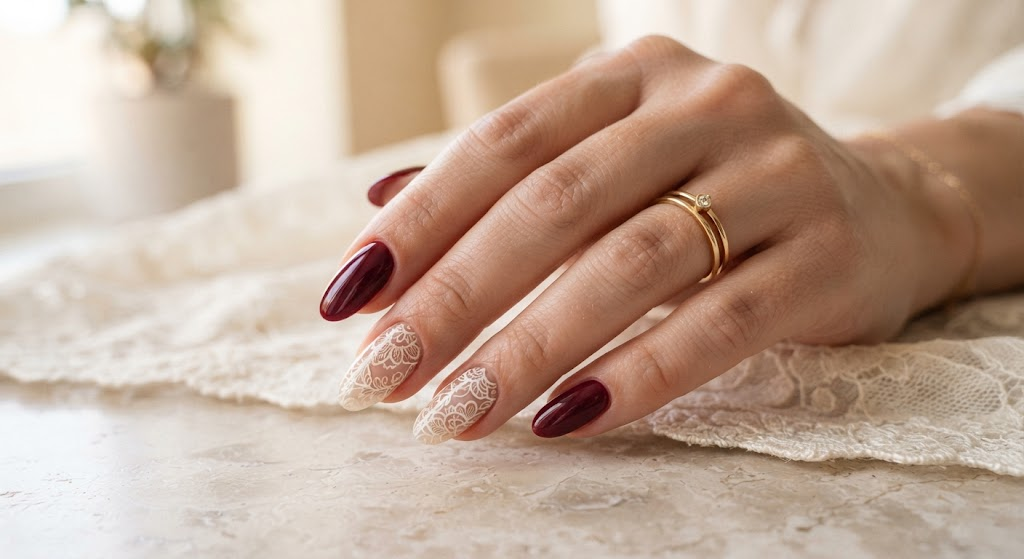
DO:
- Use a fine nail-art brush for thin lace lines.
- Keep the pattern on one or two accent nails.
- Choose cream or soft pink for clear contrast.
- Finish with a glossy top coat for a polished surface.
DON’T:
- Make every lace detail equally dense.
- Use thick lines that hide the burgundy base.
- Add too many decorative elements to one nail.
- Apply the top coat before the artwork has dried.
Lace-inspired details give a deep wine manicure a delicate contrast without changing its sophisticated character. A few fine loops, dots, and floral curves are enough to suggest the pattern. This style works especially well for weddings, date nights, or anyone who wants decorative nails without large embellishments.
Burgundy Matte Nails
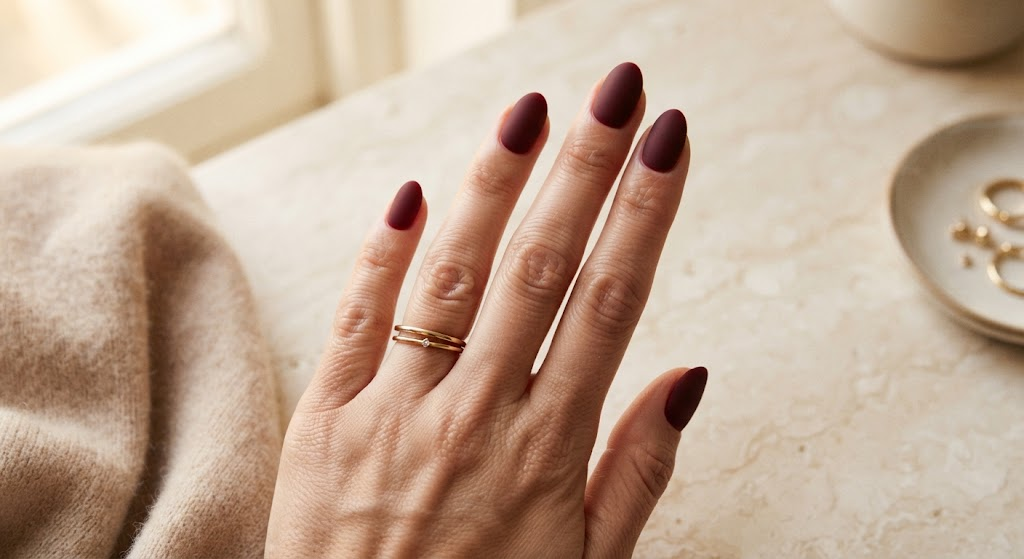
Cost: Low to Moderate | Time: 45 to 60 minutes | Skill Level: Beginner | Best For: Minimalist styling
Finish: Soft matte | Shape: Almond or squoval | Color: Deep wine | Maintenance: Avoid oily products
A matte top coat changes the character of burgundy instantly, giving the color a softer and more muted appearance. It also makes the manicure feel less glossy and more contemporary. Apply the matte layer evenly, and avoid touching the nail surface with oily fingers immediately afterward because residue can create uneven shine.
Burgundy Gold Foil
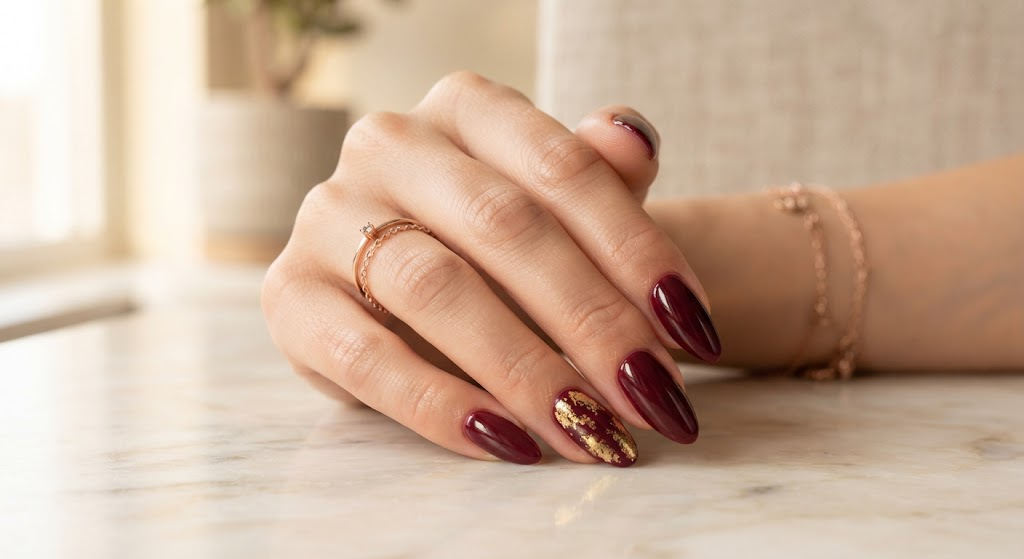
- Paint the base: Apply two thin coats of deep burgundy polish and cure or dry completely.
- Prepare the foil: Tear small irregular pieces rather than cutting uniform shapes.
- Place accents: Press a few foil pieces onto selected areas, leaving plenty of burgundy visible.
- Seal carefully: Cover the foil completely with a compatible glossy top coat.
Gold foil works because the warm metallic accent adds brightness without competing with the deep base color. Keep the pieces irregular for a natural handcrafted appearance. I’ve noticed that placing foil near the tip or along one side of the nail gives better balance than covering the center with a large metallic patch.
Burgundy Swirl Nails
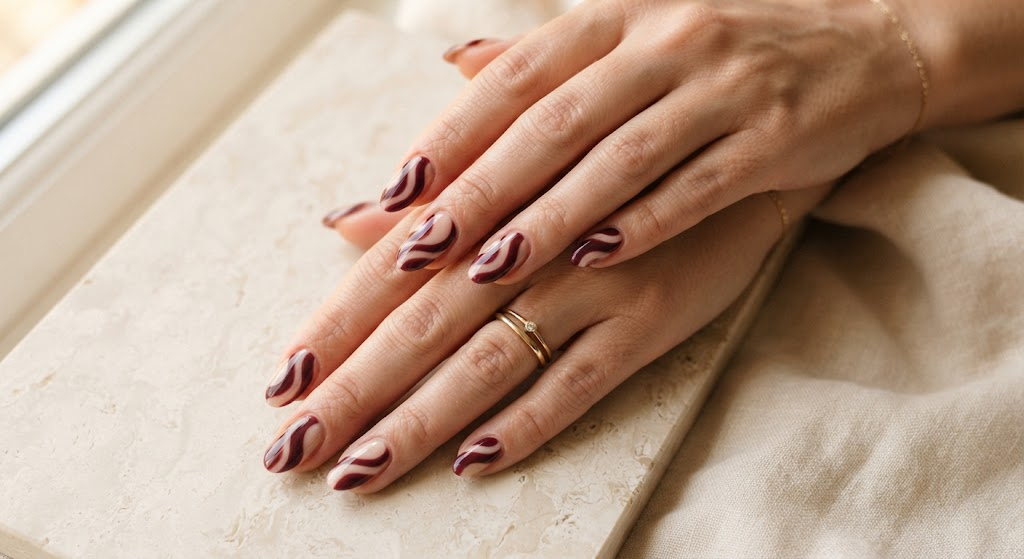
- Start with a sheer nude or blush base for a softer contrast.
- Use a fine brush to create thin burgundy curves across selected nails.
- Vary the swirl direction so the set feels organic rather than identical.
- Leave some open space between lines to keep the artwork clean.
- Seal with a glossy top coat after the design has fully dried or cured.
Curved lines make the manicure feel more dynamic than straight geometric artwork. Keeping burgundy as the main accent preserves the rich color while the nude background prevents the design from looking too heavy. This pattern is also easy to customize, from delicate single swirls to bolder layered curves on longer nails.
Burgundy French with Gold

Quick Tip: Keep the gold line thinner than the burgundy tip so it acts as a border rather than the main feature. A fine detailing brush gives better control around the French curve, especially on shorter nails where a thick metallic stripe can crowd the design.
The gold accent adds just enough contrast to make traditional French tips feel more decorative. Use a muted champagne gold for a softer look or a brighter metallic gold for evening wear. In my experience, placing the gold line directly beneath the burgundy edge creates the cleanest separation between the two finishes.
Burgundy Negative Space

BEFORE: A full dark manicure covers the entire nail surface, creating a strong, uniform block of color. On shorter nails, that can sometimes make the overall appearance feel visually dense.
AFTER: Small sections of bare or sheer nail create breathing room between burgundy shapes. The result keeps the rich color prominent while adding a modern graphic detail that feels lighter.
For cleaner negative-space artwork, use striping tape or nail guides to create sharp edges rather than relying entirely on freehand lines. A glossy nude base can also make the exposed areas look intentional and polished. Keep the burgundy sections concentrated near the tip or side for a balanced composition.
Burgundy Velvet French
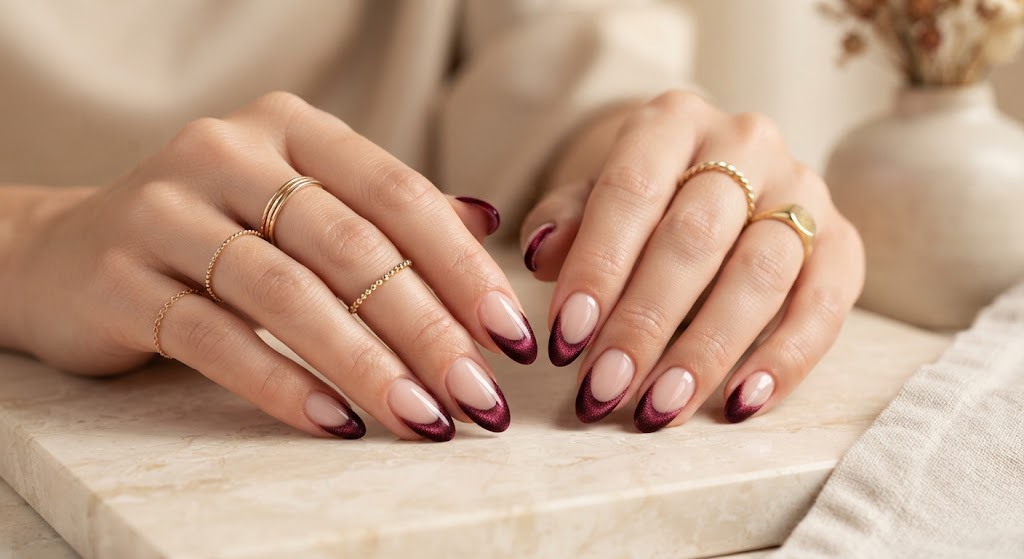
Quick Tip: Ask for the velvet effect only on the French tips while keeping the base glossy and sheer. The contrast makes the magnetic shimmer easier to see and keeps the manicure visually light instead of covering the entire nail in reflective color.
A velvet French combines two popular finishes in one wearable design. The sheer base keeps the nails fresh and delicate, while the magnetic wine tips provide depth whenever light hits the hands. Almond and coffin shapes give the curved tips enough space to show the shimmer clearly without making the manicure look crowded.
Burgundy Marble Nails
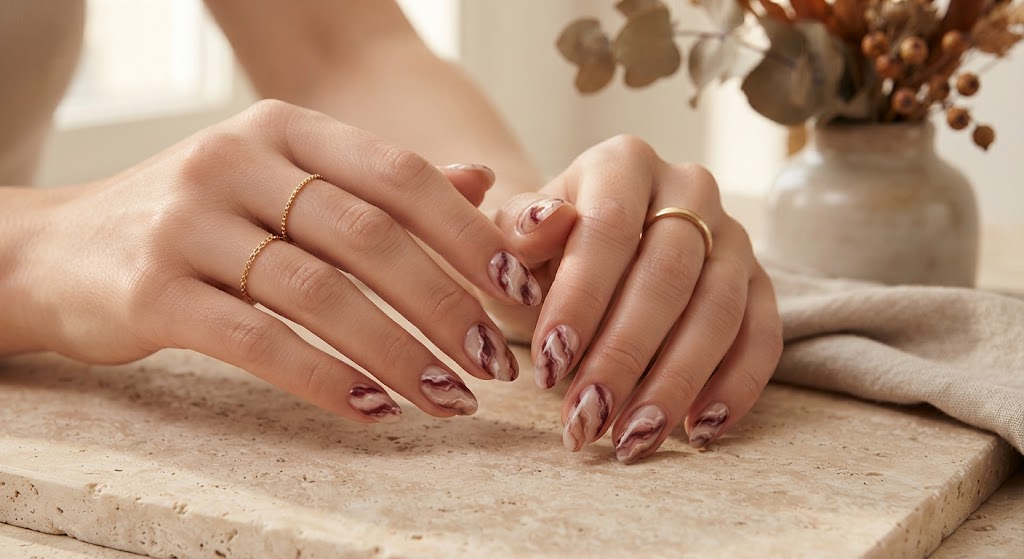
- Create the base: Apply a translucent nude or soft beige polish and allow it to dry or cure.
- Add burgundy: Place tiny irregular drops of deep wine polish across selected nails.
- Draw the veins: Use a fine brush to pull burgundy and brown lines through the lighter base.
- Soften the pattern: Add a small amount of translucent polish over areas that look too bold.
- Seal everything: Finish with a high-gloss top coat for a smooth marble surface.
Marble artwork looks best when the veins vary in thickness and direction rather than forming repeated patterns. Combining burgundy with cream and warm brown creates natural-looking depth while keeping the color palette cohesive. Use the design on two or three nails and leave the remaining nails solid burgundy for a more balanced finished set.
Burgundy and Blush
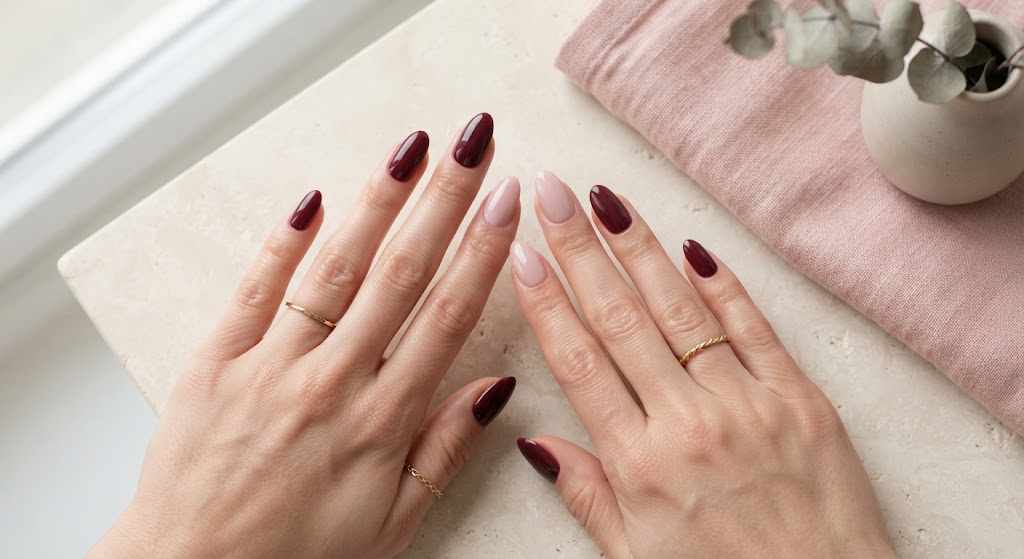
| Comparison Point | Option A: Deep Burgundy | Option B: Burgundy and Blush |
| Overall Look | Bold and dramatic | Soft and balanced |
| Color Contrast | Strong | Gentle |
| Best Season | Fall and winter | Year-round |
| Styling | Evening and polished | Casual and feminine |
Pairing burgundy with dusty blush creates a softer interpretation of a deep wine manicure. The pink tones brighten the set while the darker shade keeps it grounded. Choose a muted blush rather than a neon or overly bright pink so both colors feel intentional. This pairing works especially well with cream, taupe, denim, and neutral clothing.
CONCLUSION
A beautiful manicure does not always require complicated artwork. The right burgundy shade can look polished on its own, while velvet finishes, French tips, chrome, florals, marble, and metallic accents offer plenty of ways to personalize your look.
These Burgundy Nail Designs make it easier to find an option that matches your style, nail length, outfit, or upcoming occasion. I’ve noticed that saving a few references before an appointment can make choosing colors and details much less stressful.
Save this post on Pinterest so your favorite ideas are easy to find later. Try one design for your next manicure, then share the article with a friend who loves nail inspiration too.
As an Amazon Associate I earn from qualifying purchases.
Shop These Styles
- Burgundy & Wine Gel Polish Set — Shop on Amazon
- Gold Glitter Gel Polish for Accent Nails — Shop on Amazon
- Gold Chrome Nail Powder — Shop on Amazon
- Burgundy Press-On Nail Set — Shop on Amazon
- Cuticle Oil Pen — Shop on Amazon
Loved this post?
Follow me on Pinterest for fresh ideas every day.
Written by Zohana
Fashion Enthusiast & Capsule Wardrobe Curator
I share easy outfit ideas, hair looks, and beauty tips. I hope you find something you love.
forumComments (1)
[…] Burgundy gives almond nails a rich, warm color that works well in autumn and winter. The deep red-brown shade looks neat on medium and long nails, and the almond tip keeps it from feeling harsh. A glossy finish makes the color look deep and full. If you want a full list of looks in this shade, see these burgundy nail designs. […]